Showing posts with label chocolate. Show all posts

Friday, January 13, 2012

Recipe: Peanut Butter Blossoms

At noon today, it was snowing out, but I was packed up and ready to go spend the weekend with my cousin and her fiancé  in Maryland. I crept down the driveway in my car, inched down the slush-and-snow covered hill leading out of my neighborhood, pulled out onto the main road...and then promptly decided that taking a four hour trip in "winter weather advisory" conditions was probably not the best idea. I have high hopes that the roads and weather will be better by tomorrow so I can still go on my trip, but for today, I'm stuck home with the cats (the oldest are napping, while the two little ones are suffering from a particularly bad case of cabin fever), hanging out in my PJs and wondering if there will be any good movies on TV tonight. Frustrated and looking to keep myself busy on such a cold, dreary day, I decided to bake, and for no particular reason, I decided to make peanut butter blossoms. I've never made them before, but they are a classic cookie with a classic flavor combination—peanut butter and chocolate—that I've always enjoyed. My mom absolutely loves these cookies—any time one of her friends has them at a party or she takes home a handful from a luncheon, they're "hers" and I get maybe one for myself, so I'm excited to have a whole batch for the both of us.


Yields: Approx. 48 cookies
Prep. time: 15 minutes
Cooking time: 8-10 minutes
Difficulty: Easy
Special equipment: Electric mixer with paddle attachment

Ingredients

  • 1/2 cup white granulated sugar, plus 1/4 cup for rolling on the cookies
  • 1/2 cup packed brown sugar
  • 1/2 cup (1 stick) butter, softened (I used salted butter, because it's what we had, but unsalted should work too)
  • 1/2 cup creamy peanut butter (I used Jif brand)
  • 1 egg
  • 1/4 tsp. salt
  • 1 tsp. vanilla extract
  • 1 tsp. baking soda
  • 1&3/4 cups all-purpose flour
  • 48 Hershey Kisses, unwrapped

Directions
Preheat the oven to 375*F. In a bowl, combine the 1/2 cup sugar, brown sugar, peanut butter, and butter and beat at medium speed in an electric mixer (or by hand, if need be) until well-blended and fluffy. Add the egg, salt, and vanilla and continue to beat at medium speed until well-mixed. Add the baking soda and flour and continue to beat until well-blended. The dough will be smooth, soft, and peanut butter-colored. Roll pieces of the cookie dough (approx. 48 total) around in the palms of your hand to form one inch round balls. Roll the balls in the 1/4 cup sugar and place 2 inches apart on ungreased baking sheets. Bake for 8-10 minutes until the dough has start to expand, crack a little bit, and turn ever-so-slightly golden-brown (if you let them cook too much, you will end up flattening out the cookies when you press the Hershey Kisses in them later). Remove from the oven and immediately press one Hershey Kiss into the center of each cookie. Remove from cookie sheets and cool completely on wire racks (the chocolate will get melty all the way through, so be sure you let them cool completely so you don't smear or smush the chocolate when you put the cookies away). Store the cookies in an airtight container.

These cookies are so easy to make and you probably have all of the ingredients at home already. They've got that great classic combination of peanut butter and chocolate, and the texture—chewy-crunchy cookies with crispy sugar granules and smooth chocolate—is delicious. These are perfect with a glass of cold milk or a mug of hot chocolate. 

Tuesday, January 10, 2012

Chocolate Crème Brûlée?...or Really Fancy Chocolate Pudding?...

...fortunately, it turned out to be the former, but it had a brief second life as really fancy chocolate pudding...


After the success of my vanilla crème brûlée, my parents and I decided that the logical next step would be to make a decadent chocolate crème brûlée. I looked up various recipes before ultimately making the dumbest rookie mistake—I simply took my original recipe for the vanilla flavor and added chocolate. Crème brûlée falls into the category of baking rather than cooking, which means measurements matter, and anything you add has a reason for being there and makes something happen. In this case, melting Ghirardelli semi-sweet chocolate chips into the heavy cream (which actually would be how you'd make a chocolate crème brûlée), changes the cream and, somehow, combined with the measurements I used for each thing, ended up affecting the consistency of the final product. After baking for the required 30-35 minutes, I pulled the custards out and they were wobbly all over. In fact, they really hadn't solidified at all—the custard had just gotten a bit thicker. That sent me scrambling to find a quick fix and the best thing I could come up with was adding another egg yolk. I think that's what was wrong in the first place—I needed slightly different measurements for everything because of the addition of the chocolate. Well, I dumped the custards out into a bowl, whisked in another egg yolk, poured the mixture back in the ramekins, and baked them for another 20 or 30 minutes, hoping for the best. What I got were four ramekins filled with shiny, slightly thick, nothing-like-custard custards. Frustrated, I shoved them into the fridge to cool and ignored them until after dinner. 


After toiling away at some delicious risotto, I checked on my little failures and, much to my surprise, they'd completely solidified and looked the way crème brûlée should. Even more to my surprise, when I dipped a spoon into one and tasted it, it was fantastic! Ridiculously chocolatey and rich, with that quintessential light, creamy texture that makes a crème brûlée a crème brûlée. So, my wannabe fancy chocolate pudding turned into chocolate rème brûlée after all. Success! 


Friday, October 28, 2011

Recipe: Caramel Apples

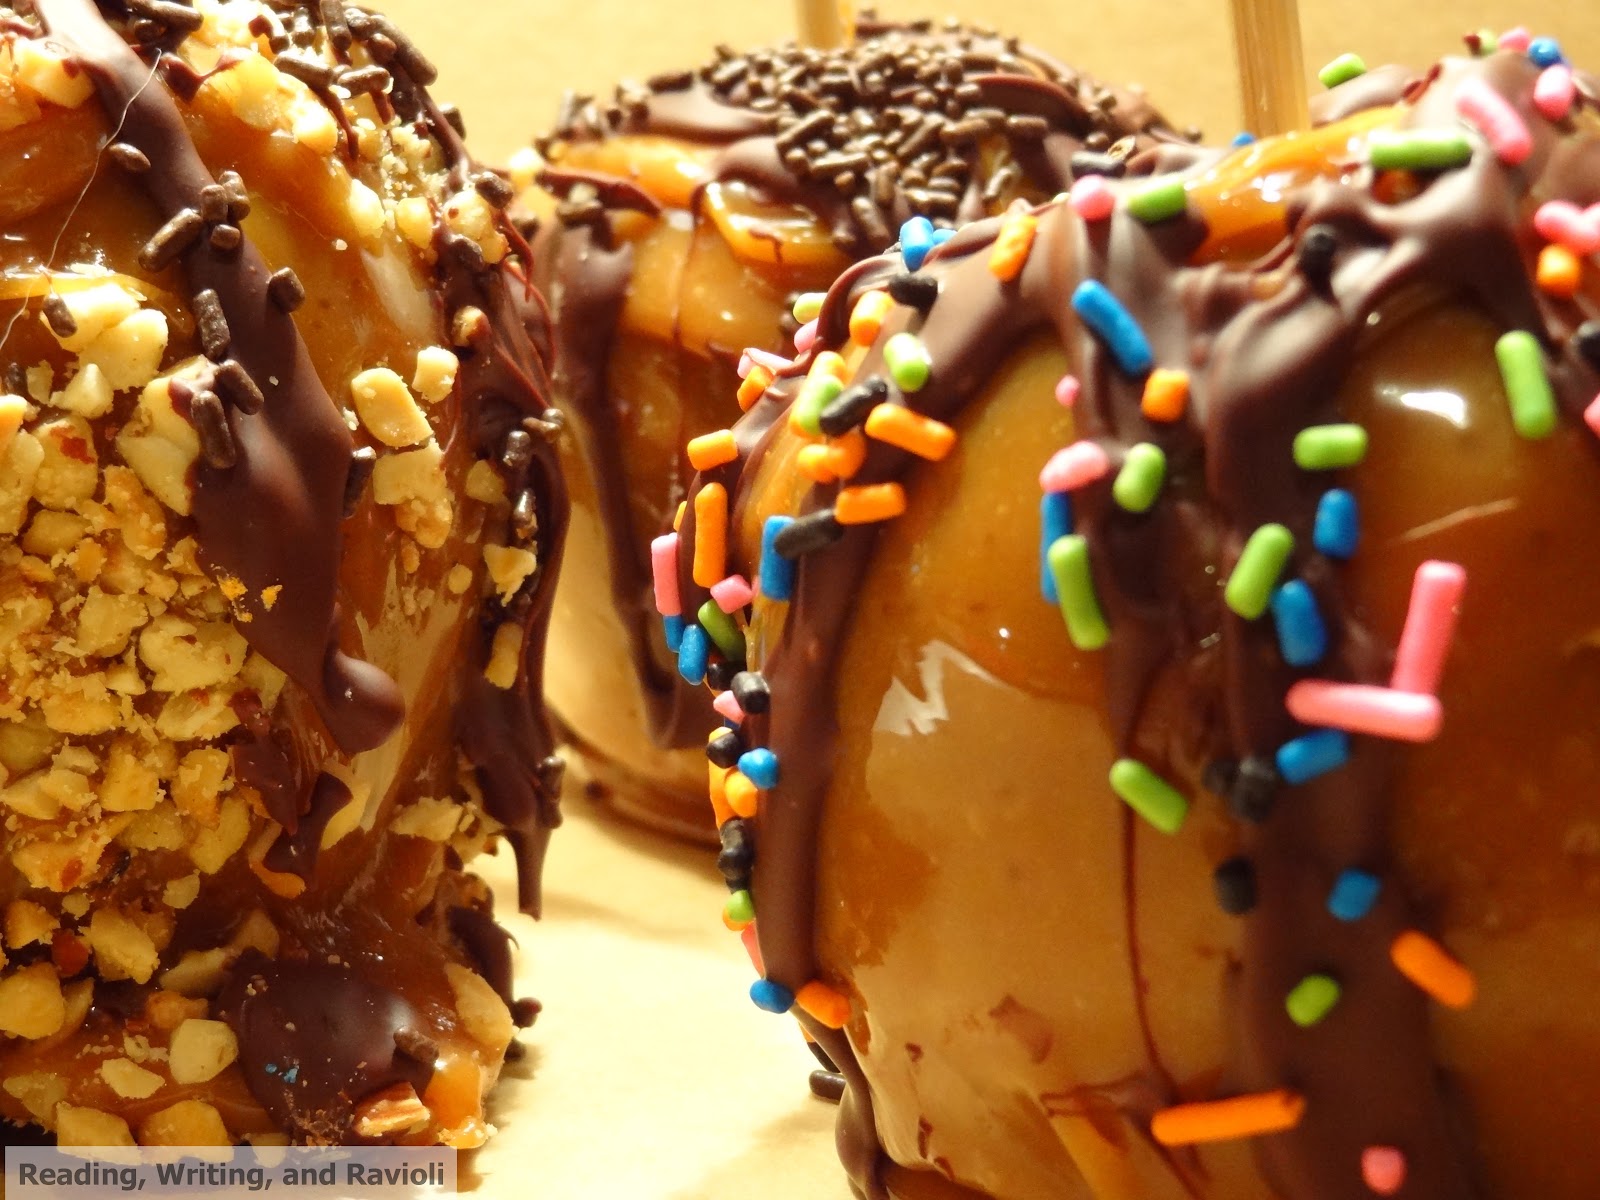
This time, last year, my boyfriend and I were craving some sort of fall-themed treat and we got hooked on the idea of making our own caramel apples. I'd just seen Giada De Laurentiis make caramel apples drizzled in chocolate on her show on Food Network and I was eager to try it out. The recipe is incredibly easy and you can personalize it by using different types of chocolate and adding fun toppings, like sprinkles or chopped nuts. My favorite thing about these apples though is that they can be made and eaten at home for a fall treat, or wrapped in wax paper, tied closed with some curling ribbon, and given out as favors, gifts, or even sent in the mail to someone special (I actually just sent a few to my boyfriend as a surprise and he was pretty excited to get them :D).


Serves: 6
Cooking time: 10 minutes, plus about 3 minutes to melt chocolate
Assembly time: 30 min.-2 hours to allow the caramel on the apples to set, plus 5-10 minutes to decorate apples, and another 2-4 hours to allow the chocolate to set
Difficulty: Easy
Special equipment: 6 wooden sticks (craft sticks, Popsicle sticks, etc.—I actually found wooded sticks in the grocery store that are marketed as sticks for caramel and candy apples)

Ingredients
  • 6 small-to-medium apples (Granny Smith are the absolute BEST—the tartness of the apple is balanced out by the sweetness of the caramel and chocolate coating)
  • 2 (9.5 oz.) bags soft caramel candies, unwrapped (I've seen already-unwrapped caramel balls in the baking aisle before, and those are so nice to use, but mostly I just stick to using the classic Kraft soft caramels)
  • 1/4 cup pulp-free orange juice (the juice helps prevent the caramel from getting too thick and sticky when melted)
  • Approx. 1/2 cup semi-sweet chocolate chips (I use Ghirardelli brand), melted
  • Toppings for the apples, chopped or crushed into small pieces—I recommend sprinkles (Halloween-themed sprinkles are so fun!), chopped nuts, or crushed candy bars (Heath Bar and Butterfinger work really well)


Directions
If the apples have a wax coating (most do), dip the apples into 6 cups of boiling water mixed with 1/4 tsp. white vinegar for 4-8 seconds to remove the coating, then thoroughly dry them. This process helps ensure that the caramel will stick to the apple.
Line a baking sheet with parchment paper or wax paper. Insert the wooden sticks halfway into the stem-ends of the apples and place them on the baking sheet. In a medium saucepan (I use nonstick, which makes cleaning a little easier), over medium-low to low heat, combine the caramel candies and orange juice. Cook, stirring occasionally, until the caramels have melted and the mixture is smooth (about 10 minutes)—be sure not to turn the heat up too high, because the caramel can burn. Set aside to cool for a minute or two, then dip the apples in the caramel until they are evenly coated (really, you kind of roll the apple around in the caramel and use a spoon to add more caramel on if needed—a heat-resistant spatula can be used to try to smooth the caramel around the apple). Place the apples back on the baking sheet and allow the caramel to set (you can put them in the fridge, will will make it go a little quicker, or let them set at room temperature).
To melt the chocolate, you can heat it in short bursts in the microwave (about 45 seconds at a time, stirring each time it's removed) until it's melted. You can also use a double boiler or a makeshift double boiler (a heat-resistant bowl set down in a slightly smaller saucepan with a small amount of simmering water)—just put the chocolate in the bowl and allow the slightly simmering water in the pot below it to melt it. Drizzle the chocolate on the apples and sprinkle on toppings while the chocolate is still wet. You can also add toppings when you first add the caramel and it's still warm and sticky. Allow the chocolate to harden, either at room temperature or the fridge, for a few hours. Serve at room temperature (the caramel hardens a little when it's chilled, which makes it hard to eat).


These apples are so delicious and so easy to make! You can personalize them so everyone gets exactly what they want and it's so fun playing around with different chocolates and toppings. Perfect for an autumn treat, Halloween party favor, or a care package!