Tuesday, December 4, 2012

Recipe: Three Cheese Tortellini and Sweet Italian Sausage in a Simple Tomato Sauce

So, I decided to keep dinner simple last night (plus, I wanted to make a fool-proof dish for my dad, to make up for the strange, sweet pasta dish from the other night). Three cheese tortellini, which can be found in the refrigerated section of the grocery store (either near the deli, or sometimes over near dairy, with the random selections of packaged lunch meats and cheeses), makes this meal a little more exciting that just a simple sausage-and-tomato pasta dish, and they're easy to prepare (you cook them just like you would regular pasta).


Serves: 4
Prep. time: 5-10 minutes
Cooking time: 15-20 minutes
Difficulty: Easy

Ingredients

  • 1 lb. three-cheese tortellini (other varieties can be substituted)
  • Olive oil, enough to lightly coat the bottom of a medium pan
  • 1 tbsp. butter
  • 3 links sweet Italian sausage, casings removed, meat pulled apart into bite-sized pieces
  • 2 cloves garlic, minced
  • 1, 14.5 oz. can petite diced tomatoes
  • 1, 8 oz. can tomato sauce
  • 1 tbsp. tomato paste
  • Salt and pepper, to taste
  • Dried Italian seasoning, to taste
  • Crushed red pepper flakes, to taste

Directions
Add olive oil and butter to a medium pan and heat over medium-high heat. Add the sausage bits and cook until just cooked through and lightly browned on the outside. Add the garlic to the pan and cook for one minute, then add the diced tomatoes, sauce, paste, and seasonings. Cook over low heat. While the sausage and tomato sauce is cooking, bring a large pot of lightly salted water to a boil. Add tortellini and cook according to package instructions (approx. 7-10 minutes). Drain the finished pasta and return to the pot. Add the sausage and tomato mixture to the pasta and gently toss to combine. Serve with grated Italian cheese (Pecorino-Romano's saltiness is a nice touch in this dish), as desired.

This dish is simple, can be made quickly, and is quite filling. Adding sausage to the tortellini and sauce mixture adds a little texture and extra flavor, and crushed red pepper flakes add a little spiciness that kicks the dish up a bit. If you want a little more heat, use hot Italian sausage instead of the sweet Italian sausage. This is the perfect dish to serve with a glass of spicy, woody red wine, and it's great the next day.

Sunday, December 2, 2012

Practice Makes Perfect

Well, it's been a while since I've had some time to play in the kitchen, and I wanted to try out something new tonight...something interesting. I found a recipe that called for a simple balsamic butter sauce and did a slight twist on it, using white balsamic vinegar, which has a lighter, sweeter taste. I figured this flavor would work better in this dish than a regular balsamic vinegar, adding a lemony, light taste that would pair well with the asparagus and chicken included in this dish. Unfortunately, it didn't quite work out the way I'd hoped it would. The result?—A strangely sweet pasta dish that my mother loved, my father hated, and that I'm still trying to make my mind up about. The sauce's flavor was unique, to put it nicely, but in a very very bizarre way...I kept imagining what it would be like in the form of a cookie, and you definitely don't want to be thinking about how the dinner you're eating could work just as well as a dessert.


It's disappointing when you make something for dinner and it doesn't turn out the way you'd imagined it would. It's even more disappointing when you share this meal with others and they don't enjoy it. But the thing is, it's all part of the learning process. Practice makes perfect. Trying out new recipes and new flavor combinations and experimenting with recipes are important ways to learn how to cook, learn how flavors/textures/ingredients interact with each other, and become a better cook. So, this meal wasn't my best, but it doesn't really matter. I'll just file it away in the "don't bother making again" recipe folder and move onto something else new and interesting.

Stay tuned for one or two more new recipes this week. I'm gonna play around with sweet Italian sausage and three-cheese tortellini one night, and I've got a bundle of veggies and Asian ingredients that I'm going to experiment with on another night.

Wednesday, November 14, 2012

Cooking in the Mountains

The other night, my best friend from home, Emmie, and I drove up to her family's mountain house for an evening of cooking and movie-watching (and wine drinking, of course). For dinner, we whipped up this dish, adapted from a recipe by David Rocco—it was loaded with eggplant, spicy Italian sausage, mozzarella, and plum tomatoes. After finishing our meal (and polishing off a bottle...or more...of red wine :D), we sat down with a plateful of Emmie's homemade tiramisu and had ourselves a little movie marathon. It was a fantastic evening and I'm looking forward to more this winter. I'm also pumped to try out some more recipes from Rocco's cookbook, Made in Italy.

Friday, November 2, 2012

Recipe: Sweet Italian Sausage and Farfalle in a Creamy Fennel and Onion Sauce

On my way back from the airport on Tuesday, I stopped by Trader Joe's (a rare treat for me, as I live 45 minutes away) and enjoyed the joy that is really cheap, really good food. While browsing through the fresh produce section, a container of fresh fennel bulbs caught my eye. Both its thin, green fronds and pale, white bulb-like stem base have a soft, anise-like taste that works in both savory and sweet dishes, and I wanted to try it out for dinner tonight. While I normally wouldn't make two dishes with heavy cream back to back (last night's blue cheese sauce was so tasty though!), this fennel was just begging to be cooked down and blended into cream. Paired with tender pasta and sweet Italian sausage, which typically contains fennel seeds in it, this sauce is perfect and pulls the whole dish together. Oh, and on an unrelated note, for once in my life, I actually took a few pictures along the way, so enjoy.


Serves: 4
Prep. time: 10-15 minutes
Cooking time: Approx. 45 minutes
Difficulty: Easy
Special equipment: Food processor or blender

Ingredients

  • 2 tbsp. butter
  • Olive oil, enough to lightly coat the bottom of a medium pan (you'll need to do this twice)
  • 2-3 sweet Italian sausage links, casings removed, pulled/crumbled into small pieces
  • 1 bulb fennel, quartered, cored, and roughly chopped (remove the top but keep the green fronds for garnish)
  • 1 onion, roughly chopped
  • 2-3 cloves garlic, minced
  • 2 tbsp. dry white wine
  • 1/2 pint heavy cream
  • 1/4 cup milk
  • Salt and pepper, to taste
  • A pinch of crushed red pepper flakes
  • A pinch of dried sage
  • 1 tsp. dried basil
  • 1 tsp. fennel seeds
  • Cornstarch-and-water mixture, as needed
  • 8 oz. small pasta (farfalle, medium shells, rotini, etc.)

Directions
Heat 1 tbsp. butter and a splash of olive oil in a medium pan over medium high heat, then add the crumbled sausage and cook until lightly browned on the outside and cooked through (approx. 10 minutes). Remove the sausage from the pan and set aside on a paper towel-lined plate (leave the leftover oil and butter in the pan). 


Return the pan to the stove over medium high heat, add 1 tbsp. butter and a little olive oil, then add the onion, fennel, and garlic. Cook for 15-20 minutes until golden brown, tender, and fragrant, then add the white wine and let it reduce a bit. 

Fennel: The top left corner is the core, below that is a quarter of the bulb, and the right is the sliced up bulb
Onions, fennel, and garlic early in the cooking process
The onions, fennel, and garlic, now soft, golden-brown, and ready for the food processor
Bring a medium pot of water to a boil and add the pasta, then cook according to package instructions (approx. 11-13 min.). While the pasta is cooking, pour the onion and fennel mixture into the "bowl" of a food processor and pulse to blend. Add heavy cream and blend until fairly smooth. Pour the mixture into a small pot and heat over medium heat. Add the listed spices and herbs and the milk. Thicken with cornstarch-and-water as needed, then reduce to medium low heat. Reheat the sausage in the microwave for 30 seconds. Drain the finished pasta and return to the pot, then add the sausage and sauce and toss to combine. Serve with a garnish of the thin fronds from the fennel bulb. 

Fennel fronds
This sauce is really something different—the fennel taste is sweet and subtle and, combined with onions, the resulting flavor is a blend of sweet and savory; there's a buttery quality to it, with a richness that creates depth. The fennel flavor in the sauce mirrors the fennel seeds that help to flavor the sausage, and pasta creates the perfect base for the two. 

Thursday, November 1, 2012

Recipe: Chicken and Broccoli Pasta with a Blue Cheese Cream Sauce

I spent this past weekend with John in Memphis, a place I enjoy more and more each time I visit. The city has a great food scene and there are so many restaurants to try. Memphis is about more than just BBQ and Southern cooking—there are restaurants offering up fantastic pizzas, tantalizing ethnic foods, delectable desserts, and more. We stocked up on cupcakes from Muddy's (their mint icing is absolutely amazing), ate a homemade hot dog and pizza with Benton bacon at Hogs & Hominy, enjoyed cheesy bread at Houston's, and got to taste an assortment of dishes from a variety of restaurants at The Dixon's Art on Fire event. On Sunday night, we went to Boscos and I had a very tasty pasta dish with grilled chicken, sun-dried tomatoes, and a gorgonzola sauce. Tonight, I was thinking back on that dish when I peered in the fridge and saw a container of blue cheese crumbles left over from some salads I'd been making last week. I'm a big blue cheese lover—I love the salad dressing, I love it crumbled on a steak or burger, and I really wanted to use that box of cheese to make a blue cheese cream sauce. That sauce, tossed with chicken, broccoli, and pasta, created a flavorful, filling dish that was perfect for this rainy day that Sandy sent our way today.


Serves: 4
Prep. time: 10-15 minutes
Cooking time: 20 minutes total (approx. 2 min. for broccoli, 5-10 min. for sauce and chicken, 11-13 min. for pasta)
Difficulty: Easy

Ingredients
  • 1-2 heads broccoli, cut into florets (or approx. 2-4 cups broccoli florets)
  • 8 oz. farfalle, or other small pasta (penne, medium shells, etc.)
  • A pat of butter
  • Olive oil, enough to lightly coat the bottom of a large pan
  • 2 chicken breasts, cut into 1-2 inch cubes
  • 2-3 cloves garlic, minced
  • 1/2 pint heavy cream
  • 1/2-1 cup blue cheese (more or less, as desired)
  • 1-2 tbsp. dried chives, or more as desired
  • Salt and pepper, to taste
  • Cornstarch and water mixture, as needed

Directions
In a medium pot, bring salted water to a boil, then blanch the broccoli florets (i.e. cook them for about 2-3 minutes in the boiling water). Drain them, then return them to the pot with cold water and some ice cubes (this will help stop them from cooking any further—the last thing you want is mushy broccoli). Add salted water to another medium to large pot, and bring to a boil. Add the pasta and cook according to package instructions (about 11-13 minutes). While the pasta is cooking, heat the butter and olive oil in a medium pan over medium heat and add the chicken. Season with salt and pepper and cook gently until tender and no longer pink in the middle (about 5-10 min.)—toss the garlic in near the end of cooking. While the chicken is cooking, heat the heavy cream over medium high heat in a small pot. Once bubbling, add blue cheese crumbles and stir to combine. If desired, add a little cornstarch-and-water to thicken the sauce. Reduce the heat to medium low. Once the pasta is finished cooking, drain it and return it to the pot, then drain the broccoli and add it to the pasta. Add the chicken and sauce to the mixture, season with salt and pepper, add chives, and toss in an extra handful or two of blue cheese crumbles. Serve hot, with added blue cheese crumbles, as desired.

This dish, though packed with blue cheese, is not overpowering, but rather quite light and flavorful. Broccoli is always delicious in a creamy sauce, especially one with cheese, and chicken adds some much-needed protein. A dash of chives and an extra spoonful of blue cheese crumbles completes the dish. 

Goat-Petting, Beer-Drinking, and Hurricane-Avoidance, or What I Did This October

So, October flew by so fast! As you can tell from the stunning lack of posts, I was pretty busy this month, and for once, it wasn't just because of work. Little ol' Sarah finally got her social life back! My best friend from high school is back in town, and we've been catching up after spending months and months apart. A visit to a local petting zoo, movie nights at her family's mountain house, and a couple delicious meals kept me occupied earlier this month, and we have more plans in the making.

Feeding the goats

Two weekends ago, I drove down to Greenville, SC for my second college Homecoming (sadly, without the boyfriend, as law school work kept him away). While definitely less exciting than last year's event, I got to see pretty much all of my closest friends, and that's what really matters. Our friend, Johnny, invited the whole group to his family's tailgate, smack dab in front of the stadium, so I spent the afternoon gorging on kebabs, cupcakes, and hard cider, while catching glimpses of the game. A short bar crawl, complete with the obligatory visit to Tassie's for a Tiger in the Tank (along with a variety of other boozy frozen drinks) and a trip to The Trappe Door for plates full of fancy fries and glasses of delicious Belgian ales, completed the day. I ended my lovely weekend at Soby's the following morning, enjoying their fantastic Sunday brunch with my best friend from college. This smorgasbord satisfied my craving for cheesy grits and I had the joy of eating chocolate fondue-dunked cookies for breakfast—what more could you ask for?

Furman's Belltower

This past weekend, I flew down to Memphis (and somehow missed the memo about Hurricane Sandy arriving the day I was due to fly home...oops), and spent a long weekend with John (a little longer than planned because of said hurricane, but I'm not complaining ;D). Having not seen him since July and thinking I wasn't going to see him again until December, this quickly-planned trip was a godsend. He greeted me with chilled white wine and chocolates, got me my very own Memphis Law tee shirt, surprised me with Chick-fil-a chicken biscuits a.k.a. breakfast in bed on my first morning there, and was his usual amazing self. We enjoyed a food-tasting/fire dancer/spark artist/auction/live music event at The Dixon, took a trip to the zoo, saw Argo (fantastic movie, by the way), and stuffed our faces with cupcakes from Muddy's and the most delicious hot dog I've ever eaten at Hogs & Hominy (along with other delicious dishes throughout the weekend). This weekend with the boyfriend was definitely a success and I'm already counting down the days until our trip to Greenville in December.

Om nom nom

Beautiful

So many colors!

So, October was all about having fun (I definitely sold my fair share of shoes this past month too though!), but now it's time to get back on track. Up this month: 1) Me, working on my diet and exercise routine, 2) Intensifying the job search, 3) So many more recipes!, 4) Working on my online presence (a.k.a. actually using my Twitter account and working on the blog, 5) Thanksgiving—definitely helping out more this year (and inevitably dying at work on Black Friday). So, stay tuned, because I'm back and ready to step it up.

Tuesday, October 2, 2012

Recipe: Chicken, Broccoli, and Rice in an Apricot Brandy Cream Sauce

Yes, yes, I know...I owe you all some more posts about my month in Scotland (because, well, it's a nice change from a slew of recipe posts, and I really do have some fun stories and pictures from my trip), but after battling jet lag, spending hours labeling and organizing over a thousand photos, and telling everyone I know and meet about it, I need a few days off before I fill up the blog with Edinburgh posts. So, for tonight, I'm just gonna post a lovely, light chicken recipe that's perfect any time of year. This chicken dish is served with a brandy cream sauce, and though I used a very old, very delicious apricot brandy for my dish, any ol' brandy will do.


Serves: 4
Prep. time: 10-15 minutes
Cooking time: 20 minutes
Difficulty: Easy

Ingredients

  • Approx. 2-3 cups broccoli florets
  • 1 pat butter
  • Olive oil, enough to lightly coat the bottom of a large pan
  • 1&1/2 to 2 cups rice
  • 2 chicken breasts, sliced into 1/2 to 1 inch thick slices
  • 1 small bunch (about 4 stalks) green onions, thinly sliced
  • 1 small clove garlic, minced
  • 1/4 cup (apricot) brandy
  • 1/2 cup heavy cream
  • Corn starch, as needed
  • Salt and pepper, to taste

Directions
Bring a medium pot of water to a boil and cook the broccoli for 4 minutes, until still a little crispy. Drain and return to the pot with cold water and ice, then set aside. Cook the rice according to package instructions (the brand I use calls for water, salt, and butter and takes 20 minutes to cook). While the rice is cooking, heat a little butter and olive oil in a large pan over medium heat. Drain the broccoli and return to the pot it was in. Add the chicken, seasoned with salt and pepper, and cook until mostly cooked through, then add the garlic, broccoli, and green onions. After about a minute, add the brandy. Cook until the brandy has reduced by at least half, then add the heavy cream and continue to cook for a few minutes. Add a little cornstarch-and-water, as needed, to thicken the sauce (I added just a little bit, just enough to slightly thicken the sauce). Season with a little salt and pepper and serve atop the rice.

This dish has very soft flavors and a light creaminess that's lovely. Tender chicken, crisp broccoli, and fluffy rice are the perfect base for this slightly sweet, creamy sauce. I highly recommend making a double batch of the sauce (1/2 cup brandy, 1 cup heavy cream), because, as is, the amount of sauce is a little on the "not quite enough" side, but either way, it's delicious and such a nice change from thicker, richer cream sauces.

Tuesday, September 11, 2012

Scotch Pies, Haggis, and Caboc, oh my!

A while ago, I wrote a post saying that I'd be travelling to Edinburgh, Scotland during the month of September to work with City Travel Review on a travel guide, and I said I planned to post a few updates while there. Well, I've officially been here for a week and only just now found time to post. Between trips to museums and galleries, walks up and down the Royal Mile, workshops for the travel guide, and visits to various pubs and cafes, I've barely had time to sit still, let alone publish a blog post. I'm totally smitten with this city and every day has been an activity-filled adventure. My mornings consist of a small group meeting and a workshop with a media professional (Anne; she's worked with the BBC and currently works on a youth/education magazine), and the afternoons are generally reserved for group excursions or free time in the city. We have twenty-three people working on the publication and most are German (three Americans, one or two Austrians, and a girl from Switzerland), so it's definitely a unique experience. I'm sharing a flat in the perfect location (right by the Royal Mile and Princes Street Gardens, two of the best parts of the city) with three other girls, including a girl from the Pittsburgh area (small world!), and I've been spending a majority of my time walking (you walk everywhere in this city!).

Edinburgh Castle

Work on the publication is going well. We've sent in a first round of articles and it's already shaping up to be a very different, original guide. Finalizing layout and choosing pictures is the next step, and a second round of articles will soon be sent in. Perhaps the best part of this job is that it is our job to go out and see and do things. We are essentially told to explore the city, see and do as much as we can, and then write about it. I could definitely get used to this.

True to myself, I've written a few articles about food in the city and I've been trying to remember to take pictures of some of the food I've been eating. Most people know Scotland for haggis, a savory mixture of minced sheep parts (liver, heart, and lungs), onion, oatmeal, and spices that's then encased in the sheep's stomach or in sausage casing before then being removed and served (sounds gross, but it's actually quite tasty). Scottish food is so much more than that though, and I'm really enjoying the chance to try so many new foods. I've discovered creamy porridge and sugary sweet tablet (a crumbly, melt-in-your-mouth sweet made with sweetened condensed milk, butter, and sugar). I've snacked on Scotch pies (meat pies) with mash (mashed potatoes) and gravy. I've tried a variety of Scottish cheeses and I'm looking forward to trying black (blood) pudding and maybe a salmon or venison dish. There's definitely a sense that Scottish food is a bit heavier and heartier, but anyone who says food in the U.K. is bad or bland should be shot. The meat pies are meaty, salty, and some are even a wee bit Christmasy (like the traditional Scotch pie, made with minced lamb/mutton and spices like mace and black pepper). The cheeses are absolutely wonderful—Caboc is like the love child of sour cream and cream cheese (creamy and thick with a rich, slightly sour flavor) and the blue cheeses are lovely. I've tried the so-called "national" drink, Irn Bru (pronounced "iron brew")—it's a soda with a bubble gum-gummy bear-cream soda taste that you'll either love or hate, and it'll get you on a crazy sugar high after just a few sips. I've been to the Edinburgh Farmer's Market and I've popped into countless little pubs (I'm absolutely loving cider—Strongbow is particularly popular here) and cafes (love getting soup, sandwich, and tea). It's also great to be in the land of Cadbury, where I can enjoy Twirls, Crunchies, and Flakes.

Cock-a-leekie soup

English cheddar sandwich with tomato chutney

Sausage pie with gravy and mash

Porridge with white chocolate, hazelnut, and tablet

Scottish Cream Tea: Scottish Breakfast tea and a scone with clotted cream and raspberry jam

It's absolutely amazing living (and eating!) here and I'm already dreading my return home (though having my own bed and my cats will be wonderful). This has been an amazing experience so far, and I'm truly looking forward to the next few weeks. Hopefully I'll get one or two more posts up during my stay, and I'll certainly post a few more photos, so be on the lookout.

Sunday, August 26, 2012

Recipe: Creamy Fontina Cheese Grits topped with Sauteed Chicken and Tomatoes

Last night, while browsing through recipes on Pinterest and TasteSpotting, I came across a shrimp and grits recipe and it stuck with me, making me think about my time in the South. I'd never heard of grits until I moved down south to start college in South Carolina in 2007. When I first came across grits, I was in our campus dining hall and passed right by, thinking that the mushy, khaki-colored mixture was some kind of strange, southern oatmeal. During fall break that year, I stayed with my suitemate and her family and we had what I call "grit sticks," or grits, chilled until semi-solid, then cut into French toast stick-style pieces and sauteed in butter, served with warm maple syrup. Now, that was pretty tasty, so I started to come around to grits, strange as they still seemed. Our dining hall served cheap, out of the box grits that were watery and relatively flavorless, but I started adding a ladle-full to my plate in the mornings and topped it with a generous lump of shredded cheddar cheese, slowly becoming a fan of this southern staple. Later, I had the chance to try the famed shrimp and grits at Soby's, this fancy little restaurant in downtown Greenville, and I was officially hooked. Not really porridge, and not quite polenta, grits are their own unique food, with a rich, creamy texture that works well in a variety of applications. Tonight, I was craving cheesy grits, and we happened to have a huge chunk of velvety fontina cheese that I knew would melt perfectly into the dish. Topped with a tomato, onion, and chicken mixture, it made for a tasty and filling meal that made my desire to move back down south that much stronger.


Serves: 4
Prep. time: 10-15 minutes
Cooking time: 20-30 minutes
Difficulty: Easy

Ingredients
For the grits

  • 2 cups water
  • 1 cup chicken broth/stock
  • 1 garlic clove, minced
  • 1/2 tsp. salt
  • 1 cup grits (I used Bob's Red Mill Organic Corn Grits/Polenta and they were excellent; make sure whatever you get is a fairly quick cooking brand but good quality as well—Bob's only took 5 minutes)
  • 7 oz. fontina cheese, shredded
  • Approx. 1/4 cup milk
  • Garlic powder, to taste
  • Salt and pepper, to taste

*Note: Depending on what kind of grits you use and how much, it may call for slightly different ingredients. No matter what though, make sure that, if the recipe calls for all water, substitute in some chicken broth, because it adds flavor. Also be sure to add in garlic when you bring the liquids to a boil to add even more flavor.

For the chicken and tomato mixture
  • Olive oil, enough to lightly coat the bottom of a pan
  • 1 tbsp. butter
  • 1 large onion, diced
  • 2 chicken breasts, sliced into 1 inch thick slices or cut into small cubes
  • 3-4 garlic cloves, minced
  • 1, 14.5 oz can petite diced tomatoes
  • 1/4-1/2 cup tomato sauce
  • 2-5 tbsp. red wine (cooking wine will do)
  • Salt and pepper, to taste
  • Fresh or dried herbs, to taste

Directions
Place a large pan over medium high heat and add the butter and olive oil to it. Add the onions and cook until they begin to soften slightly, then add the chicken and season with salt and pepper. While the chicken is cooking, combine the water, chicken broth, garlic, and salt for the grits in a medium pot and bring to a boil. Once boiling, add the grits and reduce the heat to medium low, stirring occasionally to break up any lumps. To the chicken and onion mixture, add garlic, and about 30 seconds later, add the diced tomatoes, tomato sauce, and red wine. Reduce the heat to low and let cook, making sure the chicken is cooked through but still tender. To the grits, add the milk and cheese and stir thoroughly to combine. Season with salt, pepper, and garlic powder, as desired. Serve the tomato and chicken mixture on top of a generous helping of grits and garnish with fresh or dried herbs, as desired. 

This dish is a big ol' bowl of comfort. The cheesy grits are creamy and warm—the perfect accompaniment to tender chicken, bright tomatoes, and fresh herbs. Perfect any time of year, this dish is flavorful and so easy to make. It's even better served with a slice of crusty Italian bread, a glass of red wine, and a fresh salad. (Or, you could just eat straight spoonfuls of the grits, because they are seriously that good).

Oh! On a slightly unrelated note, I finally tried out my microplane herb mill (a.k.a. a fresh herb grinder), using it to garnish tonight's meal with a mix of fresh basil and oregano.The herbs came out finely chopped like they would be in a jar of dried herbs, and the smell as they were cut was amazing. You could just as easily chop them up by hand, but this gadget was still pretty fun to use.

Friday, August 24, 2012

Recipe: M&M Cookies

So, my boyfriend, John, just started his first week of year two of law school and I wanted to send him some cookies to say "congrats" and help him get through the next week or two. He's a big fan of M&Ms (he keeps a bag stashed in a drawer by his desk expressly for snacking), so I figured M&M cookies would be a hit. The recipe is essentially your basic chocolate chip cookie recipe, with M&Ms in place of chocolate chips, so it's a no-brainer. From what I gathered online, this is the "original" recipe that appeared on old bags of M&M's, so it was created with them in mind.


Yields: About 3-5 dozen (depending on how big you make the cookies)
Prep. time: 10-15 minutes
Baking time: 9-12 minutes per batch
Difficulty: Easy

Ingredients

  • 2&1/2 cups all-purpose flour
  • 1 tsp. salt
  • 1 tsp. baking soda
  • 1/2 cup (1 stick) unsalted butter
  • 1/2 cup shortening
  • 1 cup packed brown sugar
  • 1/2 cup sugar
  • 2 eggs
  • 2 tsp. vanilla
  • 12-16 oz. (1&1/2 to 2 cups) M&Ms

Directions
Preheat the oven to 375*F. Line baking sheets with parchment paper, or, if you don't have parchment paper, simply set aside, ungreased. In a medium bowl, whisk together the flour, salt, and baking soda, then set aside. In the mixing bowl of your electric mixer, add the butter, shortening, brown sugar, and sugar, and beat on medium-high speed with the paddle attachment until well-blended, fluffy, and creamy. Add in the vanilla and then the eggs, one at a time, mixing on medium speed until well-blended. Stir in the M&Ms (I recommend stirring by hand so that the M&Ms don't get broken apart by the mixer's paddle). Drop by rounded teaspoons (I usually just form small ball-like blobs by hand) onto the prepared cookie sheets and bake each batch for 9-12 minutes, until very slightly golden brown around the edges and slightly soft in the center. Remove from the oven and let cool, then place on wire racks to cool completely before storing them (or eating a bunch!). Helpful hint: Keep a slice of bread in the pot of cookies to keep them from getting too crispy. 


These cookies are simple and classic. You can pick and choose M&M colors so that the cookies correspond to holidays (i.e. red and green for Christmas, pink and red for Valentine's Day, etc.) and they're perfect for an afternoon snack, bake sale, or family picnic.


Monday, August 20, 2012

Recipe: Bacon and Blue Cheese Burgers with Caramelized Onions

With the weather starting to cool down ever-so-slightly, we're trying to get the most out of our grill before we pack it away for the fall and winter months. We had steak and grilled red potatoes with asparagus last night, and enjoyed a few s'mores after that hearty meal (which I followed up with a raucous round of "chase the cats around the yard" to help burn off a few of those calories). Tonight, we decided on burgers, and, in the mood for something a little more exciting that your standard cheeseburger, we decided on bacon and blue cheese burgers, brushed with Jack Daniel's BBQ sauce and topped with caramelized onions. Paired with a fresh salad of baby greens and some beers, we had the perfect late summer dinner.


Yields: Approx 6-8 burgers (about 3-4 inches around), plus approx. 1 cup caramelized onions
Prep. time: 10 minutes
Cooking time: Approx. 8 minutes for the burgers; at least 30 minutes for the onions
Difficulty: Easy

Ingredients
  • Approx. 8 strips bacon (I used applewood smoked—great flavor), or more as desired
  • 1/4 cup blue cheese crumbles, or more as desired
  • Approx. 1 lb., 8 oz. lean (90%-93%) ground beef
  • 2-4 tbsp. of your favorite BBQ sauce (I used Jack Daniel's Original No. 7 Recipe sauce, which I highly recommend), plus more to add to the finished burgers
  • Salt and pepper
  • 2 large yellow onions, thinly sliced
  • Hamburger buns, as needed

Directions
In a large pan over medium-high heat, cook the bacon until slightly crispy, then set aside on a paper towel-covered plate to drain. Set the pan aside, leaving the bacon fat in it. In a large bowl, add the blue cheese, BBQ sauce, ground beef, and salt and pepper. Crumble the bacon into the mixture and mix to combine. Form the mixture into patties, being sure to press a fingertip into the center of each one to help them cook up properly. Set aside. Heat the pan with bacon fat over medium-high heat and add the onion slices. Allow to cook for at least 30 minutes, stirring occasionally, until they are caramelized (brown, sweet, and soft). Keep the pan over low heat, and in the meantime, heat the grill to medium-high heat. Cook the burgers until cooked to desired doneness, then place them on buns, top each with caramelized onions, and add more BBQ sauce as desired. Serve with a side of your choice (we chose salads, to add freshness to this rich, bacon-y meal).

This bacon and blue cheese combination, mixed with tangy-smokey BBQ, creates a perfect burger—the kind of burger you could find on the menu of any burger joint or "American-style" restaurant. These burgers are rich, hearty, meaty, and perfect for you bacon-lovers out there. Paired with a beer and fries, a tossed salad, or potato chips, they're even better.

Thursday, August 9, 2012

Recipe: Curry-Lime Chicken with Seasoned Coconut Rice and Broccoli

Looking to redeem myself for that terrible minted pea pasta dish from the other week, I went in search of a flavorful, summery recipe that would make my parents forget that the not-so-delicious pasta dish had ever happened. I came across this recipe for lime and coconut chicken while browsing through recipe posts on Pinterest and I just knew it had to be good. Unlike the minted pea dish, I was more familiar with the flavors in this dish and how they would interact with each other. I whipped up a complimentary side dish of seasoned coconut rice and fresh broccoli and the result was absolutely delicious. My dad claimed he tasted "flavors from the Caribbean," my mom said something about South America or Thai food (not sure which one, or why she thought of them), and I was thinking of Indian food with that delicious curry flavor coming through. This dish is packed with intense flavor and freshness and it's perfect on a warm summer day (and it definitely helped erase the mint-and-pea combo from our memories).


Serves: 4
Prep. time: 15 minutes (plus at least 2 hours for the chicken to marinate)
Cooking time: Approx. 30 minutes
Difficulty: Easy
Special equipment: Grill, grill pan, or George Foreman (or similar) grill

Ingredients

  • 2 chicken breasts
  • Approx. 1/3 cup coconut milk, as needed for the marinade-turned-sauce
  • 2-4 cups cups broccoli florets
  • 1/4 cup fresh cilantro, chopped
  • Lime wedges (approx. 2 per person)

For the marinade

  • 3 tbsp. oil (I used olive oil, but peanut oil or veggie/canola oil would be good choices)
  • 1/2 cup coconut milk
  • 2 tbsp. soy sauce
  • Zest of 1 lime
  • 1&1/2 tsp. ground coriander
  • 1 tsp. ground cumin
  • 2 tsp. curry powder
  • A pinch of ground cayenne pepper
  • 1 tsp. salt
  • 2 tbsp. sugar

For the rice

  • 2 cups white rice
  • 1/4 cup coconut milk
  • Juice of 1 lime
  • Zest of 2-3 limes
  • 1 tsp. ground cumin, or to taste
  • 1 tsp. ground coriander, or to taste
  • 1 tsp. curry powder, or to taste
  • 1 tsp. ground tumeric, or to taste
  • 1/4 cup shredded, sweetened coconut, chopped

Directions
Prepare the marinade for the chicken in a liquid measuring cup. Put chicken breasts in a large Ziploc bag, pour in the marinade, and place the mixture in the fridge for at least two hours, to allow the chicken breasts to fully marinate. After the chicken breasts are finished, remove them from the bag and set aside on a plate in the fridge. Preheat the grill to medium-high heat. Pour the marinade into a small sauce pan and set aside. In a medium pot, prepare the rice according to package instructions. Substitute 1/4 of the water for the rice with the coconut milk. While the rice is cooking, fill a medium-sized pot with water and bring to a boil. Once boiling, add the broccoli florets and cook for 3-4 minutes, until tender, but still firm and green. Drain them and return them to the pot; cover and set aside to keep warm. When the rice reaches the last 12 minutes of cooking, throw the chicken on the grill and grill until tender and cooked through. Set it aside on a plate; cover with foil. In the meantime, bring the marinade to a boil—this will become a sauce for the dish, but you MUST boil it for AT LEAST 2 minutes to make it safe to consume (it's had raw chicken in it, so you have to cook that out over high heat). Once it's boiled for a few minutes, add a little coconut milk to tone it down (it's very flavor-packed)—you can also add a splash of water. Add cornstarch-and-water mixture to thicken if needed. Keep over low heat, stirring occasionally. When the rice is done, add all of the remaining ingredients (seasoning, zest, coconut) for it and mix. Plate the chicken, rice, and broccoli, and serve with cilantro, lime wedges, and the marinade-turned-sauce. 

The curry and lime are the prominent flavors in this meal, but the coconut and mixture of cumin, coriander, and tumeric add depth to the dish. The sauce is powerful on its own, but perfect drizzled over the rice and chicken, and of course the broccoli, which soaks it right up. Definitely a dish with some new and unique flavors (at least for our family), and definitely a winner.

Tuesday, July 31, 2012

Just Because It Looks Good Doesn't Mean It Tastes Good

Pasta with Minted Pea sauce...when I saw this recipe online, I was intrigued. It sounded very fresh, summery, and vaguely British. I imagined a zesty, slightly sweet, quite savory dish with deep, complex flavors and a velvety texture. What I got was a very minty, very pea-y, very thick-tasting, and thus very unappetizing dinner that not only disappointed me, but my parents as well, leaving us yearning for dessert (leftover strawberry-rhubarb pie) to get the taste out of our mouths.

Looks pretty. Tastes not so pretty.

Now, I love to cook and I love to try recipes from all over. New ingredients and unique combinations of flavors and textures intrigue me and I'm fortunate enough to have parents who are willing to try out just about anything I make, even if it's a bit unusual. But, just because a recipe or ingredient sounds unique and daring and delicious doesn't mean the end result will turn out that way. I'd say that a majority of my recipes, whether created from scratch or adapted from those of others, turned out just as I expected, or better. Now, there were one or two spectacular failures along the way, like the anchovy-laced pasta dish I mentioned in this post about listening to your gut in the kitchen, but mostly, the recipes I tried out worked out just fine. Despite the successes, you've gotta be prepared for a few "A for effort" dishes along the way, and not be surprised when a dish you think sounds amazing is less than amazing when it's actually on a plate in front of you. It's all part of learning to cook and honing that skill, and while it totally sucks serving a less-than-stellar dinner, you just cross that recipe off your list and move onto the next thing (or, if you're me, you make sure the next thing you make is one of your tried-and-true recipes and hope that everyone forgets the abomination from the night before). So, for those cooks out there brooding over a bad dish, chin up and try, try again!

Saturday, July 14, 2012

Recipe: Fluffy, Flaky Buttermilk Biscuits

A little while ago, I made these delicious peach cupcakes and used buttermilk as part of the cake recipe. That carton of buttermilk has been hanging out in the fridge since then, just begging me to figure out what else I can use it in. Well, I don't know about you, but when I hear "buttermilk" I immediately think about buttermilk pancakes and buttermilk biscuits. I've got a pancake recipe that I love, but I've yet to try biscuits, so that's what I made this afternoon, working off of Alton Brown's recipe.


Yields: 12 (one dozen)
Prep. time: 10 minutes
Baking time: 15-20 minutes
Difficulty: Easy

Ingredients

  • 2 cups all-purpose flour
  • 3/4 tsp. salt
  • 4 tsp. baking powder
  • 1/4 tsp. baking soda
  • 2 tbsp. shortening (I used Crisco), chilled and cut into a few chunks
  • 2 tbsp. butter (unsalted or salted), chilled and cut into a few chunks
  • 1 cup buttermilk, chilled

Directions
Preheat the oven to 450*F. In a large bowl, stir together the flour, salt, baking powder, and baking soda. Add the chunks of butter and shortening. Using either your hands or a dough/pastry blender (I recommend using the latter because it offers more consistency and you'll create less heat than if using your hands), rub/cut the butter and shortening into the dry ingredients until the mixture looks crumb-like and the pieces of butter and shortening are pea-sized or smaller (do this quickly, as you do not want to let the butter and shortening melt at all). Make a well in the middle of the mixture, pour in the buttermilk, and stir until the mixture is just combined. Place the dough on a floured surface, put a little flour on the dough and on your hands, and gently knead the dough/fold it over on itself 5-7 times (don't work it too much because it will make the dough tough). Press the dough ball into a 1-inch thick round and use a 2-inch biscuit cutter to cut out the biscuits, being sure to press straight down into the dough as you cut. Take the scraps and form them into another 1-inch thick round and cut out remaining biscuits (work these pieces as little as possible, because, as I said, the more you mess with them, the tougher the finished biscuits will be). Place the biscuits on an ungreased baking sheet and bake until they are tall and lightly golden-brown on top (about 15 minutes). 


Whether you spread jam on them, drizzle them with honey, or smother them with sausage gravy, these biscuits are sure to please. Buttery, fluffy, and flaky, they're perfect for breakfast or a light snack (especially when they're hot out of the oven).

Thursday, July 12, 2012

Recipe: Pasta and Chicken with Sun-dried Tomatoes and Artichoke Hearts

A long day working in the basement, organizing ungodly amounts of Christmas ornaments and assorted knickknacks, left me looking for something lovely and light for dinner last night—something that could be enjoyed on the back porch with a glass of wine and a few hungry cats. Enter lemony artichoke hearts, tangy sun-dried tomatoes, and tender chicken, tossed with pasta and a light butter and olive oil sauce. 


Serves: 4
Prep. time: 10-15 minutes
Cooking time: 15 minutes
Difficulty: Easy

Ingredients
  • Olive oil, enough to lightly coat the bottom of medium pan
  • 2-3 tbsp. butter
  • 2 chicken breasts, cut into 1-2 inch cubes
  • 1, 7 oz. jar of sun-dried tomatoes packed in oil (I used Alessi brand), drained (reserve the oil in the jar or in a small bowl) and diced
  • 1, 14 oz. can artichoke hearts, drained and quartered (cut each into four pieces)
  • 2-4 cloves garlic, minced
  • 1-3 tbsp. dried Italian seasoning
  • Salt and pepper, to taste (I used a rainbow peppercorn blend, which packs some great flavor!)
  • 8 oz. spaghetti, angel hair, or linguine (for a different style, use a small/short pasta, like farfalle or penne)
  • Italian cheese, as desired

Directions
Season the chicken with salt and pepper (garlic powder is also a good addition). Heat a little regular olive oil, olive oil from the sun-dried tomato jar, and butter in a medium pan over medium-high heat, then add the chicken. Cook until the chicken is a little more than halfway cooked through. Add the artichoke hearts and cook for another 1-2 minutes, then add the sun-dried tomatoes, garlic, and a little more sun-dried tomato olive oil from the jar. Reduce the heat to medium and continue to cook, stirring the mixture occasionally. Season with salt, pepper, and Italian seasoning. While the mixture is cooking, bring a large pot of water to a boil. Add the pasta and cook according to the packaging (about 4-5 minutes for long, thin pastas). Drain the pasta, then add a little butter and a splash of sun-dried tomato olive oil to it—toss to combine. Add the chicken, artichoke, and sun-dried tomato mixture to the pasta and toss to combine. Serve topped with Italian seasoning and/or Italian cheese, as desired.

This dish offers light, bright flavors that make it perfect as a summertime dinner. Artichoke hearts have a slightly lemony taste that blends well with the tangy, sweet flavor of the sun-dried tomatoes. A "sauce" of butter and olive oil is all you need to pull the dish together, and a sprinkling of Italian cheese is a perfect way to top it off.

Friday, July 6, 2012

Recipe: Hoisin Burgers with Chili Garlic Mayo and Grilled Scallions

My brother dropped by the other night to have dinner and help me finally get my Wii connected to our wireless Internet (I had to move my Wii from my bedroom to the basement and there's a crazy button combo I have to press to turn it and the TV on, but I've got better seating now and access to Netflix, so it's all good). Anywho, we decided burgers (adapted from a recipe in a recent Food Network magazine) and onion rings would be a good choice. The onion rings were a bit of a failure, due to my inability to multitask (can't talk, watch TV, and pay attention to the deep fryer at the same time), but the burgers were tasty (especially the chili garlic sauce-mayo!) and I'm sharing the recipe for them in this post.


Serves: 4-6 (depending on how large you make your burger patties)
Prep. time: 10 minutes
Cooking time: 10 minutes
Difficulty: Easy

Ingredients
  • 1 - 1&1/2 lb. 90-93% lean ground beef
  • Salt and pepper
  • 1 bunch scallions/green onions, roots and green part removed
  • 1 tbsp. sesame oil
  • Hoisin sauce (see my recipe here)
  • Approx. 1/2 cup mayonnaise
  • 1 tbsp. chili garlic sauce (this can be found in the Asian section at your grocery store; use more if you want it spicier, less if you want it less spicy)
  • Hamburger buns
  • 1 cucumber, thinly sliced (use a vegetable peeler or mandolin to cut thin slices

Directions
Preheat the grill. Season the beef with salt and pepper, along with a splash of soy sauce or a few tablespoons of the hoisin sauce, and form into 4-6 patties (remember to press your thumb into the middle of each burger to create an indentation to help them cook properly). Toss the pieces of scallion in sesame oil and then seal them up in a foil packet. Place the scallion packet and burgers on the grill over medium to medium-high heat. Brush the burgers with the hoisin sauce repeatedly as they cook, being sure both sides get evenly coated. Cook until the scallions are tender (5-10 minutes) and the burgers are cooked to the desired doneness (about 3-5 minutes per side for medium doneness). While the burgers and scallions are cooking, whisk together the mayo and chili garlic sauce in a small bowl until thoroughly blended. Spread the chili garlic mayo on the inside of the buns, then place cucumber slices on the bottom, beef patty on top, and top the patties with the grilled scallions.

These burgers are tasty, with Asian-inspired flavor and delicious toppings. The chili garlic sauce-mayo has the kind of heat that sneaks up on you and offers a kick to the rest of the dish, while crunchy slices of cucumber help cool it down. Onion-y scallions go perfectly with the salty, meaty, peanut-y taste of the burgers.

Thursday, July 5, 2012

Recipe: Fresh Peach Cupcakes with Peach Cream Cheese Frosting

My kitchen smells like fresh-picked peaches and it's absolutely heavenly! I ran across this recipe for peach cupcakes while browsing through posts on TasteSpotting and, as a peach lover and a wannabe baker, I knew I had to make them. I made up a half batch (I've posted the full recipe though), seeing as I'm on my own this week, and I'm hoping I can resist their delicately sweet call, beckoning to me from the fridge. These cupcakes are light, with a sweet peach flavor that's very present without being overpowering. The cream cheese frosting also incorporates the sweetness of the peach, but with the creaminess of butter and the tangy flavor of cream cheese. Perfect for a summer brunch or dinner party and such a pretty, pale peachy-pink color!


Yields: 24 cupcakes
Prep time: 10-15 minutes
Baking time: 21-24 minutes
Difficulty: Easy
Equipment: Electric mixer

Ingredients
For the cakes

  • 2 & 2/3 cups all-purpose flour
  • 2 & 1/2 tsp. baking powder
  • 1/2 tsp. salt
  • 3/4 cup low-fat buttermilk
  • 1/2 cup pureed fresh peaches (cut slices off of the peach, being sure not to include the pit; skin on is okay)
  • 1 tsp. pure vanilla extract
  • 2 sticks (1 cup) unsalted butter, softened
  • 2 cups granulated sugar
  • 3 eggs (large)
  • 1.75 oz freeze-dried peaches, pulverized (use food processor or place in Ziploc bag and crush with mallet; Target's Archer Farms brand sells 1.75 oz. bags of freeze dried peaches, which is perfect)


For the frosting

  • 2 sticks (1 cup) butter (salted or unsalted)
  • 8 oz. cream cheese, softened
  • 1 tsp. pure vanilla extract
  • 1.75 oz. freeze-dried peaches, pulverized
  • 3-5 cups of powdered sugar (confectioners sugar)

Directions
For the cakes
Preheat the oven to 350*F. Line cupcake tins with liners.In a medium bowl, mix the flour, baking powder, and salt together and set aside. In a small bowl, mix together the buttermilk, pureed fresh peaches, and vanilla, then set aside. Add the butter and sugar for the cakes to the bowl of the electric mixture and, using the paddle attachment, blend on medium speed until the mixture is pale and well-blended (approx. 2 minutes). Add the eggs, one at a time, mixing well after each addition. Mix in the freeze dried peaches. Mix in the flour mixture in three batches, alternating with two batches of the buttermilk mixture (i.e. flour, then buttermilk, then flour, then buttermilk, then flour, and then all of both mixtures will be incorporated). Mix until just blended, scraping the batter down the side of the bowl as needed. Scoop even amounts of batter into the cupcake tins and bake for 21-24 minutes, until golden brown (a toothpick inserted into the center of the cake should come out clean or slightly crumby). Remove from the oven and allow them to cool for about 10 minutes, then move them to a cooling rack to finish cooling completely.

For the frosting
Using the paddle attachment on the electric mixer, mix the butter until softened and pale in color. Add the cream cheese and beat to combine, then add the vanilla extract. Add the pulverized peaches and blend thoroughly. Add 3 cups of powdered sugar to the mixture and mix. Add more as desired, and mix until the frosting is creamy, thick, and spreadable.

Spread or pipe frosting onto each of the cupcakes. Garnish each with a dusting of pulverized, freeze-dried peaches or a slice of fresh peach. Can be kept at room temperature or in the fridge (I like to keep mine in the fridge because of the cream cheese and butter in the frosting).


These cupcakes are perfect for the summer time! Fresh and dried peaches offer light, sweet, and fruity flavor, while the cream cheese in the frosting creates a tangy, buttery taste that blends well with the sweetness of the cakes.

Tuesday, July 3, 2012

Hot, hot, hot!

I'm on my own for a few days, and so far, it's been like one long weekend—eating whenever I want (nothing like pancakes at noon and pasta after 7:00pm), staying up late watching movies on the basement's big screen, and sleeping in with the cats until 10 or 11 in the morning. Oh, and I've been actively avoiding the outdoors like the plague, rather than do my usual morning walk around the neighborhood (I've settled for Wii Zumba inside instead). This heat wave in the northeast is getting a little ridiculous. I've got the A/C cranked up high and all the lights off to keep the heat down, and the poor cats all look like rag dolls, sprawled out belly up on the back porch. Weather like this makes me want to drink tall glasses Kool-Aid, eat big bowls of fruit, and gorge on ice cream.

The other night, I did what I normally do when I'm on my own for dinner—I rummaged through the fridge, found a few good items, and threw together a meal-for-one. I'd just gotten some fontinella cheese on a whim during a recent trip to the grocery store and, despite the warm weather, a hot, cheesy, saucy pasta sounded delicious. Fontinella, a white, Italian cheese, has incredible flavor—it's like a mix of sharp cheddar, Swiss, Pecorino-Romano, and Parmigiano-Reggiano. That sharp, salty, nutty flavor paired perfectly with applewood smoked bacon and fresh basil, so I had myself quite a nice dinner. Sadly, no recipe follows, as I measured nothing as I cooked and only made a one-person portion, but I wanted to share, because, well, because I can. I'll be posting two new recipes either tonight or Wednesday morning, so stay tuned for some posts with some summery treats, and try to stay cool in the meantime!

Pasta with Bacon and Basil in a Fontinella Cheese Sauce

Thursday, June 28, 2012

Recipe: Thai-Style Steak with Thai Fried Quinoa

During the pasta and grains unit in my Foods 1 class last fall, we discussed a popular alternative to rice and couscous called quinoa. Nutty, grain-like, and celebrated as a healthier alternative to other grain side dishes, quinoa has recently become pretty popular in the food world and I've been dying to try it out. I searched high and low for the perfect recipe and found this fantastic one from Iowa Girl Eats. I picked up strip steaks and created a Thai-inspired marinade, and that this unique, grain-like side dish. Eating the quinoa was a lot like eating fried rice—it's nutty, chewy-crunchy, and fluffy—and it turned out just as well as I'd hoped it would.


Serves: 4
Prep. time: 15 minutes (marinate the steaks for at least 2 hours, or up to 24 hours)
Cooking time: 15-20 minutes for the quinoa, 5-10 minutes for the complete quinoa mixture, 5-10 minutes for the steak. Approx. 30-40 minutes total.
Difficulty: Easy

Ingredients
For the marinade

  • 4 tbsp. oyster sauce
  • 1/2-1 tsp. chili garlic sauce (add more if you want it spicy)
  • 1 tsp. lime juice
  • 1 tsp. creamy peanut butter
  • 1 tbsp. brown sugar
  • 4 cloves garlic, minced
  • 2 tsp. cilantro, chopped
  • 4 strip steaks
For the quinoa
  • 1 cup quinoa, rinsed and drained (the brand I used was pre-rinsed)
  • 1 cup light/lite coconut milk
  • 1 cup chicken broth
  • 1/4 tsp. lime zest
  • Peanut oil (enough to lightly coat the bottom of a large pan)
  • 1 bunch green onions, chopped
  • 1 tbsp ginger, minced or grated/"zested"
  • 2-3 cloves garlic, minced
  • 1 cup frozen peas
  • 1, 8 oz. can pineapple tidbits, drained
  • 2 eggs
  • 1/4 cup cilantro, chopped
  • 2 tbsp. sweetened, shredded coconut, finely chopped
  • 1/4 cup peanuts, finely chopped
  • 2 tbsp. soy sauce
  • Juice of 1 lime (approx. 1-2 tbsp.)
  • 2 tbsp. soy sauce

Directions
Combine all of the ingredients for the steak marinade, then pour the mixture into a gallon size Ziploc bag, add the steaks, and mush the marinade around to coat the steaks. Put the steaks in the fridge to marinate. The longer you let the steaks marinate, the better the flavor (I put my steaks in the marinade at 11:00am and we grilled them up around 7:45pm). 
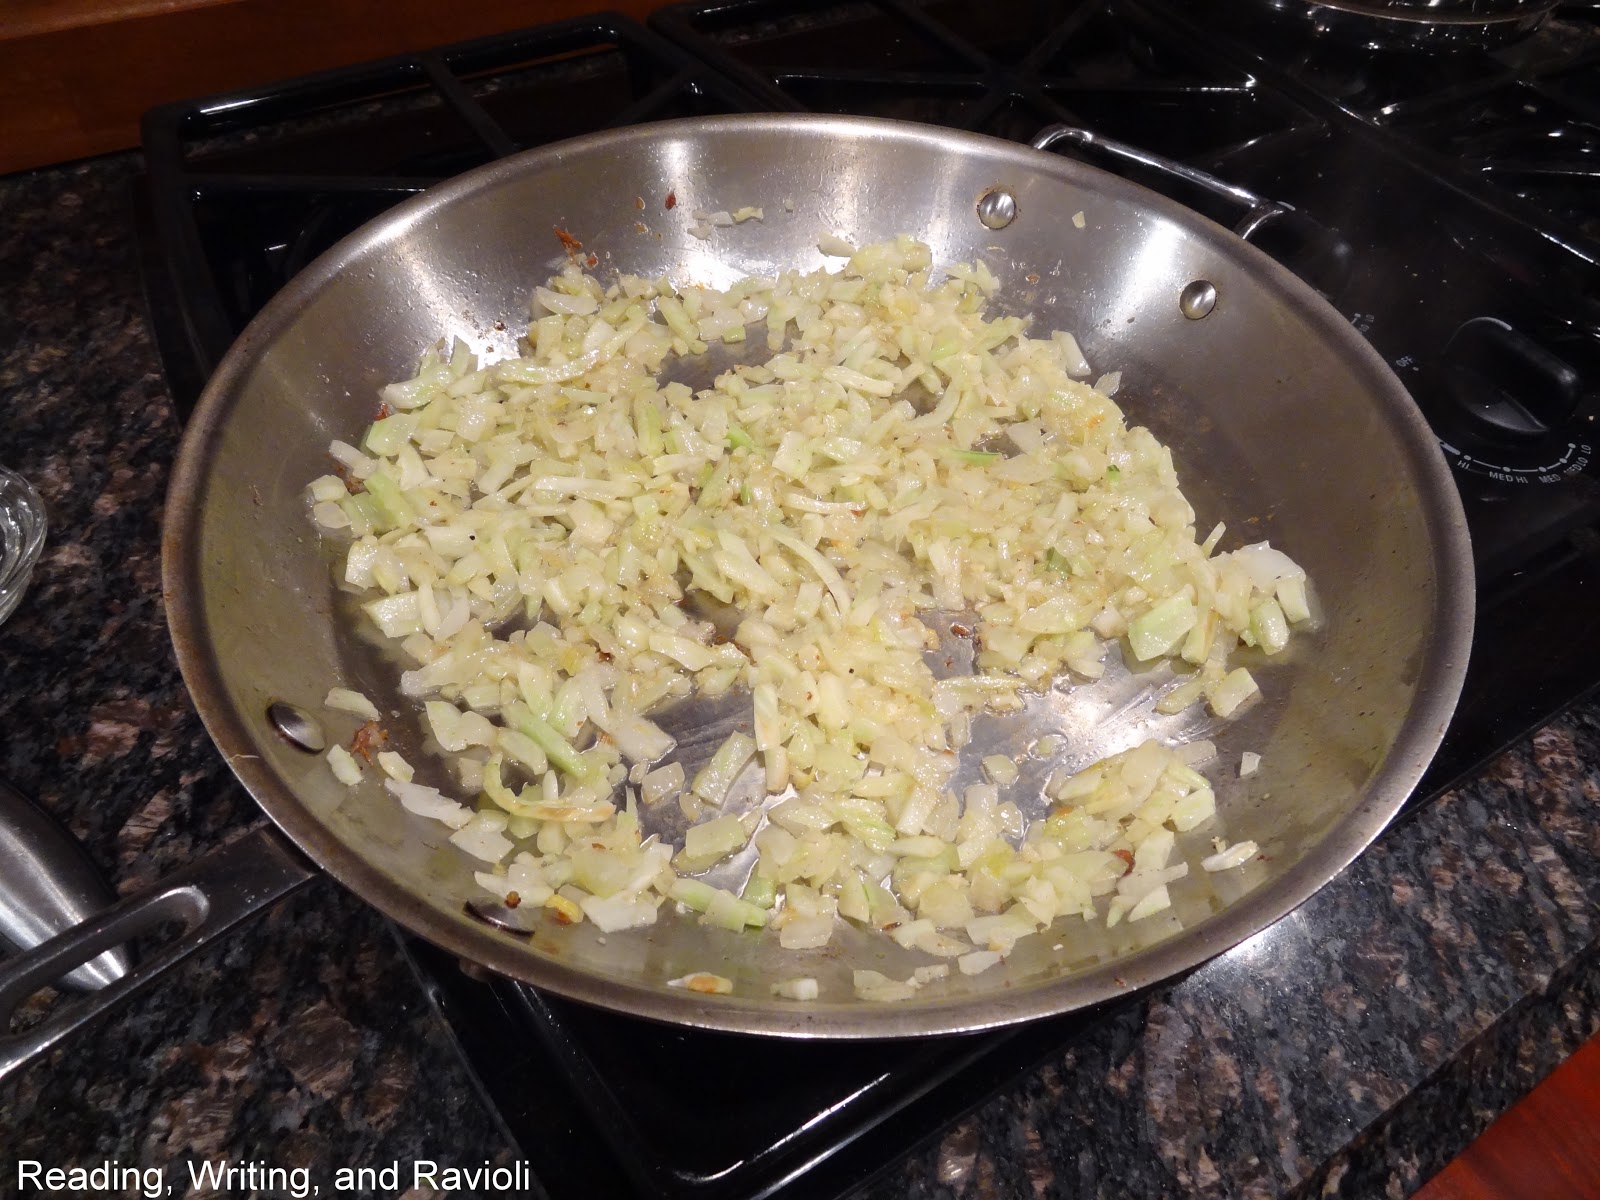
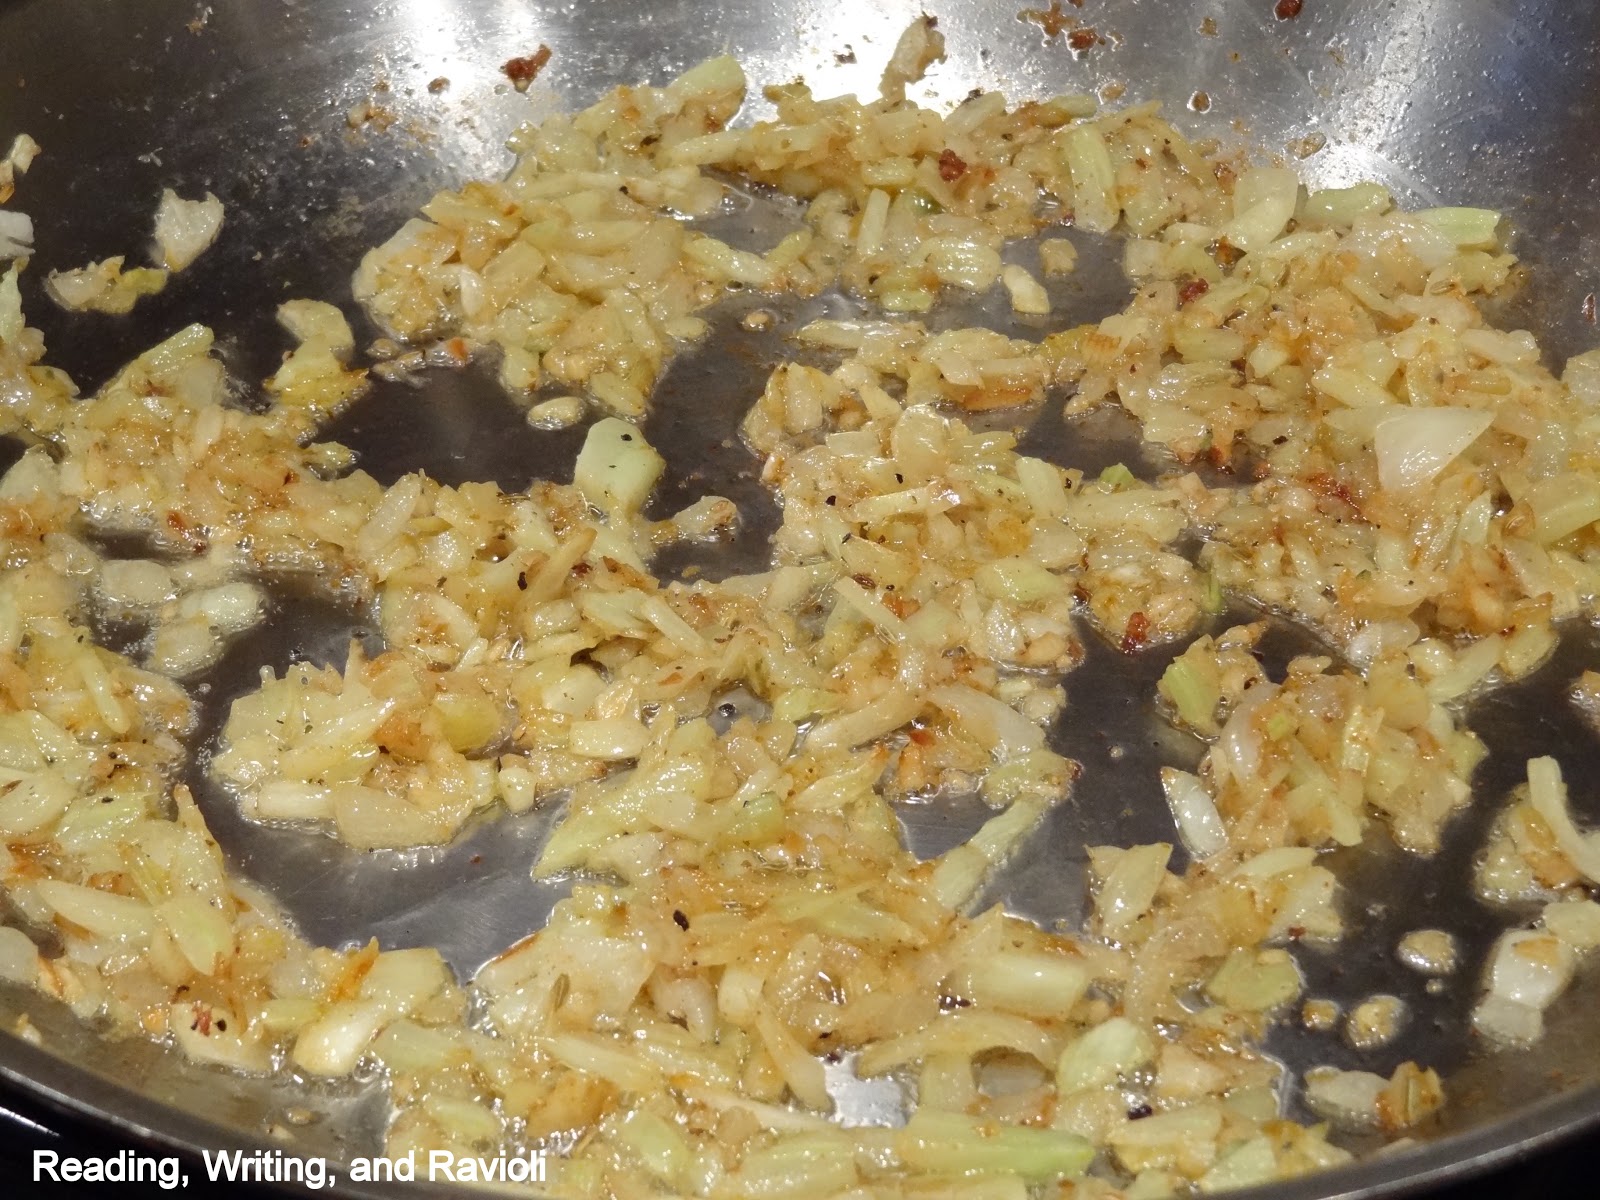
In a medium pot (approx. 2 quarts), add the quinoa, lime zest, coconut milk, and chicken stock. Bring the mixture to a boil (without a lid), then reduce the heat to medium-low and cover with a lid. Cook for 15-20 minutes, or until the quinoa is tender (a little crispiness is okay) and has soaked up all of the fluid. Once the quinoa is cooked, turn off the heat and let it sit, covered, while you work on everything else. Preheat the grill to medium-high heat, then put the steaks on and cook until they reach your desired doneness (about 5-10 minutes for medium). In the meantime, heat the peanut oil over medium high heat in a large, deep skillet or wok. Add the green onion, ginger, and garlic and cook for about a minute, until fragrant, making sure to stir frequently to prevent the garlic from burning. Add the peas and pineapple and cook for another minute, stirring occasionally. Push the mixture out to the edges of the skillet, scramble the eggs in a small bowl, and add the eggs to the middle of the skillet. Whisk them around as they cook, and once cooked through, break up the eggs and mix them into the rest of the ingredients. Add the chopped peanuts, coconut, and cilantro and stir to combine. Pour in the cooked quinoa, soy sauce, and lime juice and stir to combine. Serve the finished quinoa alongside the steaks. Add additional cilantro and peanuts as desired.

This dish is such a flavor explosion! The marinade for the steak is meaty, savory, salty, and slightly spicy. Oyster sauce is amazing and it has this savory quality that makes it perfect for many Asian dishes, particularly when used with beef. The quinoa mixture, with its sweet pineapple and coconut, salty peanuts, fresh cilantro, and sweet-spicy ginger is delicious. It's like eating Thai fried rice, but it's fluffier, lighter, and nuttier. If you're looking for something out of the ordinary for dinner (well, it was out of the ordinary for an Italian food-loving girl like me), try this out! The unique flavor combinations and the texture and taste of the quinoa make this a winning dish.

Wednesday, June 27, 2012

Recipe: Italian Burgers (Sun-dried Tomato Burgers with Basil Pesto, Mozzarella, and Basil)

I've been on this sun-dried tomato kick since this weekend—I whipped up some of my sun-dried tomato pesto on Saturday night and since then, I've put it in pasta, spread it on bread, and even stolen a few spoonfuls straight from the pot. When I finished that up, I went on a search for recipes with sun-dried tomatoes and came across this gem, switched a few things up, and went for it. So, tonight's dinner: Italian-style burgers made with ground beef, sun-dried tomatoes, and garlic served on ciabatta bread with freshly made basil pesto, creamy mozzarella cheese, and fresh basil leaves. This is a delicious Italian twist on a traditional burger—perfect for dinner out on the back porch on a warm summer evening. 


Serves: 4-6
Prep. time: 15 minutes
Cooking time: 10 minutes
Difficulty: Easy
Special equipment: Grill

Ingredients
  • 1/4 cup white onion, finely chopped
  • 2 cloves garlic, minced
  • 4 oz. (approx. 1/3 cup) sun-dried tomatoes, drained and diced (I use Alessi brand)
  • 1/4 cup grated Pecorino-Romano cheese
  • 1 lb. 90% or 93% lean ground beef
  • 1 tsp. salt
  • 1/2 tsp. black pepper
  • 4-6 slices fresh mozzarella cheese
  • 4-6 ciabatta rolls/buns (I ended up buying small ciabatta bread loaves and cutting them in half), sliced in half
  • 4-6 basil leaves
  • Approx 3 tbsp. basil pesto (see recipe here)


Directions
Preheat the grill to medium-high heat. In a medium bowl, combine the onion, garlic, sun-dried tomatoes, Pecorino-Romano cheese, salt, and pepper (to get a finer mix, put all of these ingredients in a food processor and pulse to blend, then add to the bowl). Add the beef and gently mix everything until combined (do not overwork the meat though!). Form into 4-6 (we ended up with 5) hamburger patties and make a small indentation (use your thumb) in the center of each one (this help prevents the burger from becoming domed in the center while it cooks). Cook on the grill until cooked to desired doneness (about 3-4 minutes per side to get medium doneness). During the last minute of cooking, place the ciabatta slices, inside down, on the grill and lightly toast them (this prevents the bread from soaking up burger juices—do this, and you'll never have mushy, wet burger bottoms again!). Remove the burgers and buns from the grill. Spread a little basil pesto on the bottoms of each bun, then place the beef patties on, topped with a slice of mozzarella, a basil leave, and the top of the bun. Serve will fries, chips, a salad, or whatever floats your boat, and enjoy!

Burgers, sizzling away on the grill. Gotta love those bright red chunks of sun-dried tomatoes!

These burgers are bursting with flavor—they are definitely near the top of my list of best meals I've made and  this recipe is most certainly going in my "Keep" pile. Sun-dried tomatoes are sweet, tangy, and rich, and they add a pop of flavor to the meat. The pesto is garlicky, spicy, and fresh and, like the sun-dried tomatoes in the patty, it packs a punch that really heightens the overall flavor of the burger. Soft, creamy mozzarella and fresh basil leaves add lightness and freshness to the burger. All of that on a slightly chewy, slightly crunchy ciabatta roll and you've got yourself one hell of a burger, Italian-style.

Recipe: Basil Pesto

Basil pesto...you see it in little glass jars at the grocery store, swirled into pasta at restaurants, and spread on sandwiches at lunch joints. It's a very simple mixture that can be whipped up in minutes using a food processor. It's so easy, in fact, you really should just make it yourself! Raw garlic, which has a spicy quality, and toasted pine nuts add a punch of flavor to the mix of fresh basil and parsley, while the olive oil and cheese help pull the mixture together into a delicious sauce and spread. Perfect in pasta, blended into butter or mayonnaise as a spread, spread on bread or a sandwich, or added to grilled chicken or fish—basil pesto is something everyone should know how to make.


Yields: Approx. 1/2 cup
Prep. time: 5 minutes
Assembly time (no cooking required): 5 minutes
Difficulty: Easy
Special equipment: Food processor

Ingredients

  • Approx. 2-4 oz. fresh basil leaves
  • 1/4 cup fresh Italian flat-leaf parsley
  • 1/3 cup pine nuts, lightly toasted (toast in oven for 2 minutes at 350*F)
  • 1 clove garlic
  • 1/4 cup grated Parmigiano-Reggiano and/or Pecorino Romano cheese
  • 1/4 cup extra virgin olive oil
  • Salt and pepper, to taste

Directions
Add all of the ingredients to the food processor and pulse to thoroughly blend. Use the mixture as a sauce or spread. Store in an airtight container in the refrigerator for up to a week. 

This sauce is packed with flavor: "spicy" garlic, fresh basil and parsley, nutty and salty Italian cheeses, and toasted pine nuts all create a strong flavor that works well in all sorts of dishes. 

Saturday, June 23, 2012

Reading, Writing, and Ravioli, One Year Later

So, as of today, Reading, Writing, and Ravioli has been up and running for one year now, and I am so excited to see where I can take it in the future. Since starting the blog, I've uploaded 110 posts, including 89 recipes and four culinary tips/how-to's/advice posts, plus a handful of life updates. During this past year, I've taken three culinary arts classes, worked to improve my food photography, utilized new kitchen equipment, and shown my readers just how much I love pasta. When I started out, I just wanted a place to share my recipes, whether adapted from other recipes or created from scratch in my very own kitchen. I wanted to explore my budding passion for food and cooking, and consider where this passion, along with my love for reading and writing, could take me. While I wish I had put more time and effort into this project, I'm happy with where I've gotten so far and I really look forward to continuing the blog and seeing where I can go with it. I want to cook more and post more. I want to share more advice from the kitchen, work with new foods, and open up more about my life outside of the kitchen. I want to tote my camera along to the farmer's market, restaurants, and the grocery store and be that food geek who takes pictures of the food around me. I want to follow more food blogs, read more food magazines, and cook with more people. I'm not sure I'll ever become a scheduled blogger—I don't think I can commit to a specified number of posts per week or themed posts during certain days of the week (my contingent work schedule at Macy's still throws me off during the week, and I spend a lot of time now on my job search)—but I can promise to continue to post new recipes as I try them out and post more about food in general (posts about trips to the farmer's market, dinners out at great restaurants, and other food-related experiences).

For those of you following along, I really appreciate it and I really hope you keep checking back. For those of you who just happened to pop in for a visit, please stick around! I should be posting some new recipes this week—my brother just gave my dad three new grilling cookbooks and we're eager to try them out. I'm also hoping to make it out to the farmer's market soon (we checked it out on opening weekend, but haven't been back since—such a bummer!), and I'd love to share pictures from that adventure.

So, cheers to one year! I don't have any new recipes to share now, but I'll leave y'all with a photo from my recent vacation and urge you all to check back later for new posts and updates.

Steak Salad with White Cheddar-and-Jalapeno Grits from Pig + Fish in Rehoboth Beach, DE

Monday, June 4, 2012

Recipe: Roasted Cauliflower and Broccoli Pasta with a Lemon Butter Sauce

First things first: If you don't like lemons, you will not like this dish, so turn away now. Now, for those of you still with me, I'll tell you why you will like it: it's creamy, buttery, and oh-so-lemony. Rich, roasted vegetables and pasta come together in a bright, summery sauce that's perfect for you lemon-lovers. Toss in some chicken or shrimp for protein or add a side salad with a lemony vinaigrette to add a little oomph to this dish.


Serves: 4
Prep. time: 10-15 minutes
Cooking time: 20 minutes
Difficulty: Easy

Ingredients

  • 8 oz. pasta of your choice (farfalle, penne, or medium shells would be a good choice—I used farfalle)
  • 2-3 cups cauliflower florets
  • 2-3 cups broccoli florets
  • Approx. 3 tbsp extra virgin olive oil (just enough to lightly coat the broccoli and cauliflower)
  • Zest and juice from 1 lemon
  • Approx. 1/2 stick butter
  • 2 tbsp. chicken broth
  • 1/4 cup heavy cream
  • 1 tsp. garlic powder, or more to taste
  • 1 tsp. thyme, or more to taste
  • 1 tsp. white pepper, or more to taste
  • Salt and pepper, to taste

Directions
Preheat the oven to 350*F. Spread the cauliflower and broccoli florets on an ungreased baking sheet, toss with olive oil, and season with salt and pepper. Roast in the oven for at least 15 minutes. In the meantime, bring a medium pot of water to a boil, then add the pasta and cook according to package instructions (about 8-11 minutes). While the pasta is cooking and the veggies are roasting, heat the butter and garlic in a small pot over medium heat. Add the lemon zest, lemon juice, chicken broth, and seasonings to the pot and bring the mixture to a boil. Slowly add the heavy cream, whisking it in. Add more heavy cream, butter, or seasonings as desired and reduce to a simmer. If you'd like to thicken the sauce, add a mixture of 1 tsp. cornstarch and 1/4 cup water to it. The sauce, as is, will taste very lemony, but once it's tossed with the pasta and veggies, it will get toned down. When the pasta is done, drain it and return it to the pot. Add the roasted veggies and toss with the lemon butter sauce. Serve with grated Parmigiano-Reggiano or Pecorino-Romano cheese as desired.

This dish is very light, with a clean, bright flavor that's perfect combined with the rich taste of the roasted broccoli and cauliflower. This is the sort of meal that you should enjoy while sitting out on the porch on a warm summer evening.

Thursday, May 31, 2012

Recipe: Pecorino-Romano Cheese Sauce

The other night, we had thawed chicken breasts, leftover grilled veggies, and three cups of heavy cream crowded together in the fridge, and for me this was just another night of "how can I pull these things together to create a dinner that tastes good AND helps clear out the fridge." The answer was simple: Make a sauce with the cream and toss it with the chicken, veggies, and maybe some pasta (which, of course, we always have on hand in the pantry). So, sauce. Cheese sauce made the most sense. But what kind of cheese? Well, I had an assortment to choose from— Gouda, Parmigiano-Reggiano, Jarlsberg—and I chose Pecorino-Romano, craving its distinct salty flavor. A little garlic, some onion and seasonings, and a splash of chicken broth added to the cream and cheese mix created a velvety, salty sauce that brightened up lightly-seasoned chicken and previously-grilled veggies.


Yields: About 1-1.5 cups
Prep. time: 10 minutes
Cooking time: 10-15 minutes
Difficulty: Easy

Ingredients

  • 1 tbsp. butter
  • 4 garlic cloves, minced
  • 1 small onion, finely chopped
  • Approx. 1/4 cup chicken stock/broth
  • 1 cup heavy cream
  • 1/2-3/4 cup shredded/grated Pecorino-Romano cheese
  • 1/2 tsp. white pepper (or more, to taste)
  • 1 tbsp. dried basil (or more, to taste)
  • 1 tsp. dried oregano (or more, to taste)
  • Salt and pepper, to taste
  • Cornstarch (mixed with water; as needed)

Directions
In a medium pot over medium-low heat, melt the butter, then add the garlic and onion and cook for approx. 3-4 minutes, until the mixture is fragrant and slightly soft. Add the chicken stock, then slowly whisk in the heavy cream and increase the heat to medium. When the mixture starts to bubble slightly around the edges, slowly add in the cheese, whisking constantly. Increase the heat slightly and continue to whisk until the cheese is almost completely melted. Whisk in a little regular milk if the mixture seems a little thick or lumpy. Add the white pepper, basil, oregano, salt, and pepper and whisk to combine. Let the mixture cook over medium to medium-high heat until thickened. If it seems a little thin, add a little bit of cornstarch (mix about 1 tsp. cornstarch with about 2 tbsp. cold water, then add it to the sauce). Serve over chicken, pasta, rice, vegetables, potatoes, etc. 


This sauce is creamy, salty, cheesy, and surprisingly light despite the heavy cream. It may seem quite salty and strong when tasted straight from the pot, but once tossed with warm pasta or poured over roasted red potatoes or a grilled chicken breast, it's absolutely perfect—bright and flavorful. We had it as a pasta sauce, tossed with pieces of sauteed chicken, whole wheat farfalle pasta, and grilled vegetables (squash, zucchini, bell peppers, cherry tomatoes, and onion) and it was ridiculously tasty. We had some sauce leftover, so we ate it over breaded chicken breasts and roasted new potatoes the next night, and it worked so well. Despite being a cream sauce, its bright, cheesy flavor works well in warm weather dishes.

Tuesday, May 29, 2012

Cake, creme brulee, and chicken, oh my!

So, evidently, we're either competing to see who can cook the most or my mother and I are just insane. Right now, I've got a lavendar-vanilla creme mixture steeping for creme brulee, an olive oil cake just came out of the oven, and I've got a cheese sauce bubbling away on the stove. Oh, and there are pieces of chicken and veggies waiting to get sauteed in a pan and more chicken is being pounded out mercilessly by my mother. The sad (or great?) part is, we're only cooking for two things: tonight's dinner and my mother's bookclub tomorrow. I am not looking forward to washing all of these dishes, but wow, do I love spending time in the kitchen.

Not-so-great photo courtesy of my phone