Showing posts with label water. Show all posts

Sunday, April 28, 2013

Recipe: Quick and Easy Microwaveable Brownie for One

Sometimes you want a brownie, and you want it NOW. You want it chocolaty, hot, and hopefully topped with a scoop of ice cream or paired with an ice cold glass of milk. This desire for a brownie hit me not once, but twice, a few weeks ago (it had been a loooooong week), and I went on a mad online search for a decent recipe for microwave brownies (because waiting for a batch to bake in the oven was so not happening). I found one on Food.com that looked pretty good—I know that a brownie made in a cup and thrown in the microwave can't possibly compare to a batch properly cooked in the oven, but it's really nice to have the option to make a quick brownie when you want one. This recipe results in a fluffy yet gooey brownie rather than a dense and chewy brownie or cake brownie, and it just makes a single serving. You can make it in a mug, but I made mine in a small, microwaveable mixing bowl. I added a few drops each of peppermint and spearmint extract to make a minty brownie and topped mine with mint chocolate chip ice cream, but I've just listed the main, plain recipe here.

When I said I wanted it NOW, I meant it. There was no time to take a proper picture. NO TIME!

Serves: 1
Prep. time: 5 minutes
Cooking time: 1-1&1/2 minutes
Difficulty: Easy

Ingredients

  • 2 tbsp. unsalted butter, melted
  • 2 tbsp. water
  • 1/4 tsp. pure vanilla extract
  • 1 dash (approx. 1/8 to 1/4 tsp.) salt
  • 4 tbsp. granulated sugar
  • 2 tbsp. unsweetened cocoa powder (I just used Hershey's, but the better quality you use, the better the flavor)
  • 4 tbsp. all-purpose flour

Directions
Melt the butter in a mug or small, deep bowl, in the microwave. Add the water and vanilla to the mug/bowl and whisk to blend. Add the sugar and salt and whisk to blend. Add the cocoa powder and flour and whisk to blend. The final mixture should be well blended, with no lumps (there may be some graininess because of the sugar). "Bake" in the microwave for 1-1&1/2 minutes, but no longer (too long and it'll get burnt and dried out; a minute and 15 seconds is just about right). The brownie should be soft and slightly gooey in the middle (unless you cooked it a bit longer); it will also be very hot, so be careful. Let it sit for a minute or two before eating. Best served with a scoop of ice cream, a dollop of whipped cream, or a glass of milk.

Simple and tasty—that about sums it up. It's not a dense brownie square like you'd get from a proper batch of oven-baked brownies, but it's chocolaty, gooey, ready in a minute, and you can eat it with a spoon, so it's pretty damn delicious nonetheless.

Sunday, April 21, 2013

Recipe: Lemon Cheesecake with a Raspberry Swirl

So, making a cheesecake was my way of dealing with the fact that I had a box of Girl Scout Trefoil cookies, which were pretty tasteless (at least in comparison to Walkers brand shortbread, which is far superior), that I refused to waste. The easiest way to use them, in my mind, was to make a crust with them, and I felt that cheesecake was the ideal filling for said crust (plus, I've never made cheesecake before, and I wanted to try something new). While out to dinner with a friend, I mentioned my plan for this cheesecake and we started brainstorming ideas for flavors for the dessert (because New York Style with gooey strawberry puree on top was not gonna cut it). We both mentioned lemon and raspberry in almost the same breath, and I was immediately hooked on the idea, so I found this great recipe from The Girl in the Little Red Kitchen to work off of. Even though Pennsylvania still can't seem to decide if it wants winter or spring (and thus, we go from 70 degrees one day to 40 degrees the next), I felt the flavors of lemon and raspberry were bright and perfect for this transitional stage between the end of winter and beginning of spring. Lemon and cream cheese, each with their own tangy flavor, go perfectly together, while sweetened raspberries add another dimension to the flavor and help sweeten the cheesecake. Aside from the exceptional flavor, this cheesecake is thick, creamy, and decadent—so rich that even I, champion of eating ALL the dessert, only cut myself the slimmest slice so as to avoid overdoing it.


Yields: About 16 servings (depending on how large your slices are)
Prep. time: 20-30 minutes
Cooking time: 10 min. for the crust, approx. 1-and-a-half hours for the cheesecake
Difficulty: Easy to moderate
Special equipment: Springform pan, food processor, stand mixer, strainer

Ingredients
For the crust
  • 1&1/2 sleeves Girl Scout Trefoil cookies (or approx. 1 box of your favorite shortbread cookies/approx. 20 cookies)
  • 2 tbsp. granulated white sugar
  • 4 tbsp. unsalted butter, melted
For the raspberry puree swirl
  • 10-12 oz. fresh or frozen raspberries
  • 1/4 cup granulated white sugar
  • 1/4 cup water
For the cheesecake filling
  • 4, 8 oz. blocks/packages of cream cheese (I used Philadelphia 1/3 Less Fat), room temperature
  • 1 cup granulated white sugar
  • Zest of 3 lemons (approx. 2 tbsp.)
  • 1 cup sour cream (I used a low fat style), room temperature
  • 4 large eggs, room temperature (you can bring them up to room temperature faster by placing them, still in the shells, in a cup or bowl with warm-to-hot water)
  • Juice of 3 lemons (approx. 1/2 cup)
  • 1/4 tsp. salt
  • Additional 1-2 tbsp. sugar (to help cut some of the acidity of the lemons)

Directions
For the crust
Preheat the oven to 350*F. In a food processor, pulse the cookies until they are broken down into a fine crumb, then add the sugar and melted butter and pulse to blend until the cookie mixture is wet and looks a bit like damp sand. Spray or butter your springform pan, then pour the cookie mixture into the pan and press evenly on the bottom and up onto the sides. Bake for 8-10 minutes, until the crust is golden brown. Set aside to cool.

For the raspberry puree swirl
Add the raspberries, sugar, and water to a small saucepan and heat over medium high heat for approx. 10 minutes, until the raspberries are completely broken down and the mixture is bubbling. Remove from heat and pour the mixture through a fine mesh strainer into a small bowl or measuring cup (the strainer removes all of the unwanted lumps and seeds and gives you a nice, clear puree). If the puree is a little watery, boil for about a minute to slightly thicken in. Set aside to cool (I placed mine in the fridge to cool faster).

For the cheesecake filling
Lower the temperature of the oven to 325*F. Wrap the bottom and outside sides of the springform pan in aluminum foil, so no water will leak inside while cooking (the cheesecake will be cooked in a water bath). In the bowl of your stand mixer, on medium speed, cream together the cream cheese, sugar, and lemon zest until the mixture is smooth and airy (approx. 3-5 minutes). Add the sour cream and mix it in, then add the eggs, one at a time, fully incorporating each one before adding the next. Add the lemon juice, salt, and extra sugar to the mixture and blend, scraping down the sides of the bowl, until the mixture is well mixed. Pour the mixture into the prepared pan with crust and smooth the top of the batter with a spatula so it is even and smooth. Carefully drizzle part of the raspberry puree in a large circle around the edge of the batter, then another slightly smaller circle in the middle, and a smaller circle inside of that (3-4 rings of raspberry puree should be fine; you should have puree leftover). Take a skewer, chopstick, or other long and thin kitchen utensil/tool and make a zigzag motion across the batter from top to bottom, then side to side, creating a swirl pattern. Place the springform pan in a larger pan (make sure it's not too tight of a fit). Boil a pot of water and pour the boiling water carefully into the larger pan (do not splash any water into or onto the cheesecake) so that the water comes up about halfway up the sides of the springform pan. Bake for about an hour and 30 minutes, until the cheesecake no longer jiggles much in the middle (a little jiggling is fine, as the cheesecake will continue to cook a little even after being removed from the oven, and it will firm up after removal from the oven). Remove the cheesecake and let it cool in the pan for at least 2 hours, then remove the pan (leaving the bottom) and allow the cheesecake to cool for at least 5-6 hours in the fridge. Save the remaining raspberry puree in an airtight container in the fridge.
Serve the cheesecake with an extra drizzle of raspberry puree, if desired, and if you're feeling a little adventurous (as I was), add a dollop of homemade whipped cream (1/2 cup heavy whipping cream, 2 tbsp, sugar, and 2 tbsp. of the raspberry puree whips up to create a lovely raspberry whipped cream). Keep the cheesecake and puree in the fridge to keep them fresh. 

The cheesecake, fresh out of the oven. My puree was a little thin, which caused it to pool a bit when I drizzled it on and swirled it, but I still think it looks pretty good!

This cheesecake is phenomenal, with flavors that are perfect for the spring and summer months. Bright, tangy lemon tempered by the sweetness of the raspberries and creaminess of the cheesecake batter itself makes for a delicious cheesecake. It's both light and incredibly rich, with a smooth, thick creaminess that's oh-so-decadent. I think other flavorings could easily be subbed in for the lemon and raspberry, so this is definitely a recipe you can play around with, but this raspberry and lemon combo is pretty hard to beat.

Wednesday, March 27, 2013

Recipe: Mushroom-less Chicken Marsala

I had set out chicken to thaw in the fridge the night before last and had been eyeing the head of broccoli nestled in the veggie drawer—I was going to make something for dinner last night, I just didn't have a plan. Realizing I wouldn't be home from work until 6:00pm, I needed something quick, so it wasn't the best night to be experimenting with a new recipe. I asked my mother about maybe just having her make either her much-loved Chicken Kiev or her Mushroom-less Chicken Marsala, but she's been feeling a bit under the weather, so we picked the latter of the two dishes (because it's easier and faster) and came to a compromise: she would do as much prep. work as she felt she was able to do, and I would swoop in and take over after getting home from work. She managed to trim and flatten the chicken breasts, but the rest was up to me.

Now, this dish is one of my mom's classic dinner dishes—she's been making it for as long as I can remember and I was terrified of messing it up, because her version is just so good. Aside from letting the sauce reduce a bit too much and overloading a bit on the parsley (her recipe had the measurement for fresh parsley, while I was using dry parsley, and you need far less dry than you need fresh), the meal turned out well and I'm happy to share this variation on Chicken Marsala with you.


Serves: 4
Prep. time: 10-15 minutes
Cooking time: 10-15 minutes
Difficulty: Easy

Ingredients

  • 2 large chicken breasts (boneless, skinless), flattened to about approx. 1/4-to-1/2 inch thickness (pound them out between two pieces of plastic wrap using a meat mallet)
  • 1 large egg, whisked together with 1-2 tbsp. water
  • 1/2-to-1 cup panko coating/bread crumbs (use more, as needed)
  • 1 head broccoli, trimmed and cut into florets
  • Approx. 6-8 oz. egg noodles (we usually use large noodles)
  • Salt and pepper
  • Butter and olive oil

For the sauce
  • 4 tbsp. (1/2 stick) salted butter
  • 4 tsp. all-purpose flour
  • 2 garlic cloves, minced
  • 1 cup water
  • 1/3 cup Marsala wine (we use cooking wine, but the real stuff has better flavor)
  • 4 tsp. dry parsley (or 1/4 cup fresh)
  • 1 tsp. chicken granules or bouillon (you just add it directly to the sauce—no water needed)
  • (Salt and) pepper, to taste

Directions
Preheat the oven to 225*F. Spread the panko out on a plate or piece of wax paper and season lightly with salt and pepper. Dip each piece of chicken in the egg-and-water mixture (it's best if this is in a shallow bowl), thoroughly coating each piece, then dip each piece into the panko and coat thoroughly. Heat a little butter and olive oil in a medium pan over medium-high heat, then add the chicken. Cook evenly on both sides, letting each side crisp up and turn lightly golden brown. When they've just about cooked through, remove them from the pan, set them in an oven-safe dish and put them in the oven to keep warm. Bring a medium pot of water to a boil, then add your noodles and cook according to package instructions (about 7 minutes). After 4 minutes have passed cooking the noodles, add the broccoli to the pot with the noodles and cook until done (this will cook the broccoli gently, but don't add the broccoli too early, or it will get mushy). While the noodles and broccoli are cooking, add the butter for the sauce to the pan used to cook the chicken and heat over medium heat. Once it's melted, add the flour and whisk it in to blend it into the butter. Add the garlic, cook for about a minute, then add the water, Marsala wine, parsley (if using fresh, add it at the end—fresh herbs lose their flavor quickly when cooked), chicken granules/bouillon, and pepper (and salt, if needed) and stir or whisk to blend. Continue to stir and increase the heat until the sauce starts to boil and thicken (about 1 minute), then reduce the heat to low. When the noodles and broccoli are done, drain them and return them to the pot (add a little butter if desired to prevent the noodles from sticking). Pour the sauce into a gravy boat. Serve the chicken alongside the broccoli and noodle mixture and top with sauce.

This is the Chicken Marsala I grew up with—flavorful, simple, and mushroom-less. My mother has never liked mushrooms and, until recently, I didn't either, so it took me a long time to realize that my mother's recipe was a bit different than the usual. Despite it's differences, it's absolutely delicious. Marsala wine adds sweetness to the sauce, while the butter and chicken granules add saltiness. Garlic and parsley add a little pop of flavor, while the flour helps to thicken the sauce. We used to use regular bread crumbs on the chicken, but the panko just crisps up so much nicer and makes the chicken lighter. Tender egg noodles make a nice change from pasta and broccoli adds freshness to the dish. It's a twist on a classic, and it's absolutely delicious. 

Friday, March 22, 2013

Recipe: Red Velvet Brownies with Cream Cheese Icing Drizzle

I spent last week in Memphis with my boyfriend, making the most of his week-long spring break. We spent a few quiet days in Arkansas, at an old hunting lodge/clubhouse his family is a member of, and spent the rest of the week at his family home. I ate some great food (including a homemade beef and cheddar hot dog in a soft pretzel bun from Hog & Hominy, a burger at Huey's, and of course, cupcakes from Muddy's), met some of his law school friends, had some "arts and crafts" time (we painted pottery and made glass dishes--both were a lot of fun to work on!), and visited a few galleries and museums. As a thank you to him and his family for hosting me, I thought it would be nice to bake brownies and send them down their way. I found this recipe for red velvet brownies and knew I had to try it out—I don't generally play around with baking recipes because they are so precise and I find it hard to change and edit ingredients (it's so much easier to mess up in baking than it is in cooking), so I left it as is, but added a little drizzle of cream cheese icing to give them a little more flavor (makes 'em prettier too). The resulting brownies were perfectly chewy and dense with a light, flaky top, just like a brownies should be, and the drizzle of icing added a little tangy flavor and creaminess to them.


Yields: 1, 9x13 inch pan of brownies (approx. 20 brownie squares)
Prep. time: 10-15 minutes
Baking time: 35-40 minutes
Difficulty: Easy

Ingredients

For the brownies

  • 1 cup (2 sticks) unsalted butter, room temperature
  • 1&1/2 cups brown sugar
  • 1&1/2 cups granulated sugar
  • 4 large eggs, room temperature
  • 2 oz. red food coloring (if you don't have enough food coloring, add water to get the required measurement)
  • 4 tsp. pure vanilla extract
  • 2&1/2 cups all-purpose flour
  • 6 tbsp. unsweetened cocoa powder (I used Hershey's, because that's all I could find, but a better quality brand will yield better brownies)
  • 1/2 tsp. salt

For the cream cheese icing drizzle
  • 2 oz. cream cheese
  • Approx. 1/2 cup powdered sugar (or more, as needed)
  • 1/2 tsp. vanilla extract
  • 2 tbsp. milk

Directions
Preheat the over to 350*F. Spray a 9x13 inch clear, glass baking dish with cooking/baking spray. Using the paddle attachment in your mixer, beat together the butter and both sugars on medium speed until creamy, light, and fluffy (approx. 2-3 minutes). Add the eggs slowly, one at a time, mixing well after each addition. Slowly add the food coloring and vanilla and blend on medium speed until the color is fully incorporated. In a medium bowl, add the flour, cocoa powder, and salt and whisk to mix. Slowly add this mixture to the mixing bowl on medium speed until it's fully incorporated—be careful not too over mix though.  The batter should be quite thick and all of the flour should be mixed in. Pour the batter into the greased baking dish and spread evenly in the dish. Bake for 35-40 minutes, until done (insert a toothpick in the center—if it comes out wet with batter, the brownies need more baking time, but if it comes out clean or a little crumby, the brownies are done). Brownies should be a little flaky on the outside, but slightly moist on the inside. Set aside to cool.

While the brownies are cooling, add the the ingredients for the cream cheese icing drizzle to a small bowl and whisk to blend (you can use the mixer, once clean, to make this go a little faster and to mix it better, but I was too lazy to clean the mixer and ended up whisking together the icing by hand). The finished icing should be thick, but still be able to be drizzled easily. Cut the brownies into squares and, using a spoon, drizzle the icing as neatly as possible over each square (I actually used a squeeze bottle to get more precise drizzles; you can use an icing/pastry bag with a round tip for neater results). Let the icing set (it will not get hard, but rather, it'll thicken and be a little sticky) for a few minutes.

Serve with a glass of cold milk or a mug of hot coffee, or whatever beverage you prefer. Perfect with a scoop of vanilla (or perhaps red velvet, for added red velvet-ness?) ice cream or with some fresh berries. Store brownies in an airtight container and avoid stacking them, if possible, because the cream cheese drizzle will get smeary and smudged.


These brownies are essentially your basic, everyday brownies, but the pop of red food coloring and the sweet and tangy cream cheese icing drizzle add a little pizzazz to them. Great for dessert, for a party, or an afternoon snack, these brownies are chocolaty, chewy, and absolutely delicious.

Thursday, January 10, 2013

Recipe: "Fried Rice" Quinoa

Once again, I had no recipe planned for dinner, so when I told my mother "Hey, I'll make dinner tonight if you'd like me to," I then immediately thought "Wait...why did I just say that? There's no chicken thawed out, we just had pasta (which is my go to ingredient), and I've got job applications to work on today....what the hell am I gonna make?" My mother offered to bring chicken up from our extra freezer (you know the one...it sits in your garage or basement, crammed with packs of chicken, some years-old bags of frozen veggies, and a box of Popsicles or ice cream sandwiches). I knew I didn't want pasta, I didn't want to bother with rice, and my initial plan to make polenta fell through because I barely had 1/4 cup left. I had three boxes of quinoa beckoning me to cook some, and a small collection of vegetables stashed in the bottom drawer of the fridge, alongside a forgotten chunk of fresh ginger, so I thought I'd go for an Asian-style quinoa. The idea of fried rice came to mind, so I decided to replace the rice with quinoa and use the chicken to make the dish more substantial and filling. This kind of dish is perfect, because you can use pretty much any vegetable you have on hand—I had snow peas, onions, and cauliflower—and you could use any meat (chicken is a staple in our house, but shrimp, steak, or scallops would work well). This dish pulled together easily and the sauce blended into the quinoa mixture popped with the flavors of garlic, fish sauce, soy, and mirin.

Sadly, my lovely, white plating plate was in the dishwasher during this shot

Serves: 4
Prep. time: 10-15 minutes
Cooking time: 20-30 minutes
Difficulty: Easy

Ingredients
For the chicken marinade

  • 2 chicken breasts, cut into 1-2 inch cubes
  • 1/4 cup soy sauce
  • 2 tbsp. mirin (cooking sherry works as well)
  • 1 tbsp. oyster sauce
  • 1 tsp. fish sauce
  • 1/2 tsp. sesame oil
  • 1 tbsp. rice vinegar
  • 1-2 tsp. freshly grated ginger (dry ginger works as well)
  • 1 clove garlic, minced
For the sauce
  • 1/4 cup soy sauce
  • 1/4 cup water
  • 1-2 tbsp. mirin (cooking sherry works as well)
  • 1 tbsp. oyster sauce
  • 1-2 tsp. fish sauce
  • 1 tsp. sesame oil
  • 1 tsp. rice vinegar
  • 1-2 tsp. freshly grated ginger (dry ginger works as well)
  • 1 clove garlic, minced
For the remainder of the dish
  • 1 cup dried quinoa (I use Ancient Harvest's Traditional Quinoa, which calls for 1 cup quinoa and 2 cups water; it cooks in 10-15 minutes)
  • Peanut oil, enough to lightly coat the bottom of a large pan or wok
  • Approx. half a head of cauliflower, cut into florets
  • Approx. 6 oz. snow peas, cleaned
  • 1 large onion, chopped
  • 3-4 eggs, scrambled

Directions
Mix together the ingredients for the marinade in a medium bowl, add the chicken, stir to coat, and set aside in the fridge. Mix together the ingredients for the sauce in a small bowl, and set aside. Cook the quinoa according to package instructions. While it's cooking, steam the cauliflower until tender, yet crisp (you can also parboil it, then shock it with ice and water to stop the cooking; steam or parboil any hard vegetables you plan to use, like carrots or broccoli). Heat peanut oil in a large pan or wok over medium high heat. Add the chicken (do not pour in the marinade though) and cook until about half done, then add the onions. Add the cauliflower and snow peas (or whatever vegetables you've chosen) after the chicken has just about cooked through. In a small, nonstick pan, cook the eggs until you've got fluffy, scrambled eggs, then break them up and add them to the pan with the chicken and veggie mixture. Add the finished quinoa and toss to combine. Pour in most or all of the sauce and thoroughly mix it in. Serve with additional grated ginger on top, as desired.

Quinoa is a great alternative to rice, and it's incredibly healthy. Its fluffy texture and nutty taste work in just about any dish, and it absorbs the Asian flavors in the dish nicely. Crispy snow peas and cauliflower, paired with fluffy eggs, and softened onions add flavor and texture to the dish, and chicken helps turn this side dish into a real meal. 

Sunday, August 26, 2012

Recipe: Creamy Fontina Cheese Grits topped with Sauteed Chicken and Tomatoes

Last night, while browsing through recipes on Pinterest and TasteSpotting, I came across a shrimp and grits recipe and it stuck with me, making me think about my time in the South. I'd never heard of grits until I moved down south to start college in South Carolina in 2007. When I first came across grits, I was in our campus dining hall and passed right by, thinking that the mushy, khaki-colored mixture was some kind of strange, southern oatmeal. During fall break that year, I stayed with my suitemate and her family and we had what I call "grit sticks," or grits, chilled until semi-solid, then cut into French toast stick-style pieces and sauteed in butter, served with warm maple syrup. Now, that was pretty tasty, so I started to come around to grits, strange as they still seemed. Our dining hall served cheap, out of the box grits that were watery and relatively flavorless, but I started adding a ladle-full to my plate in the mornings and topped it with a generous lump of shredded cheddar cheese, slowly becoming a fan of this southern staple. Later, I had the chance to try the famed shrimp and grits at Soby's, this fancy little restaurant in downtown Greenville, and I was officially hooked. Not really porridge, and not quite polenta, grits are their own unique food, with a rich, creamy texture that works well in a variety of applications. Tonight, I was craving cheesy grits, and we happened to have a huge chunk of velvety fontina cheese that I knew would melt perfectly into the dish. Topped with a tomato, onion, and chicken mixture, it made for a tasty and filling meal that made my desire to move back down south that much stronger.


Serves: 4
Prep. time: 10-15 minutes
Cooking time: 20-30 minutes
Difficulty: Easy

Ingredients
For the grits

  • 2 cups water
  • 1 cup chicken broth/stock
  • 1 garlic clove, minced
  • 1/2 tsp. salt
  • 1 cup grits (I used Bob's Red Mill Organic Corn Grits/Polenta and they were excellent; make sure whatever you get is a fairly quick cooking brand but good quality as well—Bob's only took 5 minutes)
  • 7 oz. fontina cheese, shredded
  • Approx. 1/4 cup milk
  • Garlic powder, to taste
  • Salt and pepper, to taste

*Note: Depending on what kind of grits you use and how much, it may call for slightly different ingredients. No matter what though, make sure that, if the recipe calls for all water, substitute in some chicken broth, because it adds flavor. Also be sure to add in garlic when you bring the liquids to a boil to add even more flavor.

For the chicken and tomato mixture
  • Olive oil, enough to lightly coat the bottom of a pan
  • 1 tbsp. butter
  • 1 large onion, diced
  • 2 chicken breasts, sliced into 1 inch thick slices or cut into small cubes
  • 3-4 garlic cloves, minced
  • 1, 14.5 oz can petite diced tomatoes
  • 1/4-1/2 cup tomato sauce
  • 2-5 tbsp. red wine (cooking wine will do)
  • Salt and pepper, to taste
  • Fresh or dried herbs, to taste

Directions
Place a large pan over medium high heat and add the butter and olive oil to it. Add the onions and cook until they begin to soften slightly, then add the chicken and season with salt and pepper. While the chicken is cooking, combine the water, chicken broth, garlic, and salt for the grits in a medium pot and bring to a boil. Once boiling, add the grits and reduce the heat to medium low, stirring occasionally to break up any lumps. To the chicken and onion mixture, add garlic, and about 30 seconds later, add the diced tomatoes, tomato sauce, and red wine. Reduce the heat to low and let cook, making sure the chicken is cooked through but still tender. To the grits, add the milk and cheese and stir thoroughly to combine. Season with salt, pepper, and garlic powder, as desired. Serve the tomato and chicken mixture on top of a generous helping of grits and garnish with fresh or dried herbs, as desired. 

This dish is a big ol' bowl of comfort. The cheesy grits are creamy and warm—the perfect accompaniment to tender chicken, bright tomatoes, and fresh herbs. Perfect any time of year, this dish is flavorful and so easy to make. It's even better served with a slice of crusty Italian bread, a glass of red wine, and a fresh salad. (Or, you could just eat straight spoonfuls of the grits, because they are seriously that good).

Oh! On a slightly unrelated note, I finally tried out my microplane herb mill (a.k.a. a fresh herb grinder), using it to garnish tonight's meal with a mix of fresh basil and oregano.The herbs came out finely chopped like they would be in a jar of dried herbs, and the smell as they were cut was amazing. You could just as easily chop them up by hand, but this gadget was still pretty fun to use.

Monday, April 16, 2012

Recipe: Chicken, Broccoli, and Almond Stir-fry with Rice

During my grocery shopping trip yesterday, I decided to throw caution to the wind and just grab whatever caught my eye, rather than buy based on already picked out recipes. I bought asparagus, broccoli, quinoa, Parmigiano-Reggiano cheese, and roasted almonds, among other things, knowing that I could easily find ways to work them into dinners this week. Looking into the fridge and pantry tonight, I pulled out the newly purchased broccoli and roasted almonds, plus a handful of other ingredients, and whipped together a quick and easy stir fry that was so delicious.


Serves: 4
Prep. time: 10 minutes (plus a little extra time for the chicken to marinate)
Cooking time: Approx. 20 minutes for the rice, 10 minutes for the stir fry
Difficulty: Easy

Ingredients

  • 2 chicken breasts, cut into 1 inch wide and 2 inch long strips
  • 1 large bundle of broccoli (approx. 3 bunches, or 3-5 cups), cut into florets (or 1 large bag of frozen broccoli florets)
  • 2 cups dry white rice (plus any ingredients needed to cook it)
  • 1/2 - 2/3 cup whole roasted almonds, roughly chopped
  • 1 onion (or 1 bunch of green onions), sliced into thin rings
  • 1 clove garlic, minced
  • Peanut oil (enough to lightly coat the bottom of a pan)


Chicken marinade


  • 1 clove garlic, minced
  • 1/4 cup soy sauce
  • 2 tbsp. mirin or sherry
  • 1 tsp. oyster sauce
  • 1/2 tsp. grated ginger


Sauce


  • 1/4 cup soy sauce
  • 1/4 cup water
  • 1 tbsp. mirin or sherry
  • 2 tsp. oyster sauce
  • 1 tsp. honey
  • 1/2 tsp. grated ginger
  • 1 tbsp. cornstarch

Directions
Mix together the ingredients for the marinade in a small-to-medium bowl, then add in the chicken and stir to coat. Put the bowl in the fridge while you do your other prep. work. Bring a medium pot of lightly salted water to a boil and quickly cook (about 4 minutes) the broccoli, then drain it, and return it to the pot with cold water and ice to stop any residual cooking. Combine the ingredients for the sauce, whisk together, and set aside. Cook the rice according to package instructions (the brand I use calls for a little water, salt, and butter, and the rice cooks for about 20 minutes). During the last 10 minutes the rice is cooking, heat a little peanut oil in a large, deep skillet or a wok over medium-high heat. Add in the onion and garlic to the skillet and cook for just a minute or so, until the onion starts to brown slightly, then add in the chicken (try not to pour too much of the marinade in with it). Cook until the chicken is just barely cooked through, then toss in the almonds. Drain the broccoli, then add it to the skillet and stir everything to combine. Make sure the chicken is cooked through, but tender. Slowly pour in the sauce and cook until it's slightly thickened (2-5 minutes). Serve the finished stir-fry over rice.

This dish is flavorful and easy to prepare—perfect for weeknights or a casual weekend meal. The crunchy almonds are slightly softened in the heat and blend perfectly with fresh broccoli and tender chicken. The soy and oyster sauces in the stir fry sauce add a savory, salty-meaty taste ("umami"), while the sherry and honey add a touch of sweetness for balance. Fluffy white rice is the perfect thing to pull it all together.

Sunday, February 5, 2012

Recipe: Basic Pizza Dough

Being the good little cook-daughter that I am, I agreed to help my mom out with food for the Super Bowl party she hosted tonight. I mentioned that an Italian bread recipe we tried in class the other week can also work as pizza dough and she was instantly hooked on the idea of making homemade pizza. I pulled a recipe for pizza sauce from Food.com and edited it a bit (recipe in a separate post), and we used the basic pizza dough recipe from Mark Bittman's How to Cook Everything. The dough is incredibly easy to pull together and takes just 1 to 2 hours to rise. You can mix it by hand, or with a mixer or food processor—my mom and I made five batches of dough, using both the KitchenAid mixer and the food processor, and we found that the food processor blended the ingredients together faster and more evenly, so the recipe below is based around the use of a food processor. The result was soft dough that crisped up just right when baked and made for a delicious slightly crunchy, chewy crust.

The dough, fresh out of the food processor

The dough, after rounding

The dough, risen to twice its size


Yield: Makes 1 large or 2 small pizzas
Time: 10 minutes to blend and knead, 1-2 hours to let rest and rise
Difficulty: Easy
Special equipment: Food processor or mixer

Ingredients

  • 1 tsp. instant or rapid-rise yeast
  • 3 cups all-purpose or bread flour (we used bread flour), plus more for dusting
  • 2 tsp. kosher or sea salt
  • 1 cup of room temperature water, plus more if needed
  • 2 tbsp. extra virgin olive oil, plus more to coat the bowls used to hold the dough

Directions
In a food processor, add the yeast, then the flour, then the salt, and blend. With the food processor running, gradually pour in the water—the flour mixture will start to look a little darker and wet, and then it will pull together into a thick, sticky dough. Gradually add the olive oil to the dough and continue to blend until the dough is pretty much all pulled together into a ball and is slightly sticky. If it's very sticky (sticking to your hands and very hard to get off), add just a pinch more flour and blend. Remove the dough ball from the food processor and place on a lightly floured surface. Gently knead the dough for just a few seconds, until the dough looks smooth. Round into a ball and place in a bowl that's been lightly brush with olive oil. Cover tightly with cling wrap and set aside in a warm, dry place (it's winter here, and quite cold, so we just put the bowls in the warmest room of the house, which happens to be a living room area at the front of the house). Let sit for 1-2 hours until the dough ball is twice its original size. If you want the dough to rise more slowly, place the bowls in the refrigerator for 6-8 hours. Once rested, remove the now-larger dough ball and prepare your pizza, or, if you plan to use it up to 24 hours later, tightly wrap it in cling wrap and place it in the fridge until ready to use. If you want to use it later than a day later, wrap it tightly in cling wrap and freeze for up to one month.

This dough is very easy to make and it's ready for your favorite pizza sauces and toppings in no time! If you want to use a mixer to make this, follow the same steps, but use your dough hook to blend the dough. Traditional pizzas (we used a red sauce, cheese, and a variety of toppings) should take about 10-15 minutes to cook.

Tuesday, January 24, 2012

Salt Your Pasta Water

Dinner was casual tonight, i.e. my dad's out of town in State College, PA for the evening and my mom and I agreed to each do our own thing for dinner. My go-to easy dinner is pasta with a little butter, olive oil, garlic, and cheese, and tonight wasn't an exception (though I added a side salad to get some healthy greens in my body). Cooking pasta is pretty basic—boil water, add pasta and cook, drain, and serve—but many people forget one key thing: salting the pasta water.

Now, any of you who cook pasta often will likely have heard or seen in recipes that you should salt your pasta water and some of you may be wondering why...is it for flavor? Does it help the water boil faster? Does it keep pasta from sticking? Pasta, particularly dried and out-of-a-box pasta, has very little flavor, and it takes a sauce or some sort of light seasoning to kick it up a notch. Adding salt to water adds flavor to the pasta. That rumor that salt raises the temperature and makes the water "boil better" or boil at a "higher heat" is false. In fact, the salt in the water only raises the temperature by about 1*F or maybe 2*F, which is insignificant. As for salt helping to keep it from sticking, it doesn't. Olive oil can be added to the water to help prevent sticking, but I don't recommend doing this, because the oil prevents sauces from sticking well to pasta after it's been drained—you should stir pasta when it's first put in the boiling water to help evenly distribute starches from the pasta and keep the pasta from sticking.

Now, there are varying ideas about how much salt should be used in pasta water. Some people claim the water should be salted enough so that it tastes like the sea (that's really salty, but you'll be draining all of the water anyway, so not that much is actually absorbed by the pasta), while others say to add just a pinch of salt. I add a small handful (see picture) when I'm cooking a portion for myself or two people, and a larger handful with larger batches of pasta. From what I've read and seen, a tablespoon or two of salt per 4 or 5 quarts of water seems to be the general consensus on the salt-to-water ratio. You don't need to use any special kind of salt—your average table salt (we have a big container of Morton's brand that we use) works just fine, and it's a lot less expensive than using nice sea salt or a fancy salt grinder (though any salt will work). Add the salt to the water right as it's coming to a boil and add the pasta shortly after that, that way, the pasta can absorb a bit of it before the salt dissolves completely in the water.

Small amount of salt for a single serving of pasta (should have taken my claddagh ring off...got salt underneath it :P)

Salt in the bottom of the pot (I added it before boiling so you could see it)

So, next time you make pasta, try adding some salt to the water right before you toss in your pasta and see if it gives the pasta a little more flavor.

Friday, January 20, 2012

Recipe: Crab Rangoon

My mom's been craving Chinese food lately, so deciding on tonight's dinner of beef with broccoli and snow peas was very easy. I'd yet to try out my deep fryer, so I decided this meal would pair up perfectly with fried crab rangoon, those deliciously golden-brown wonton pockets filled with cream cheese, flaky crab meat, and green onion. They're easy to make, and any excess filling can be stored in an airtight container in the fridge for a few days. Now, it's important to understand that I used a deep fryer to make these. You can fry foods without a fryer, typically by heating oil in a pot on the stove while carefully monitoring the temperature (I've done it before—it's a little terrifying and you have to be incredibly careful), and you can also do no-fry methods by utilizing some sort of fat (butter, cooking spray, etc.) and an oven. But for this recipe, I'm using a deep fryer, so keep that in mind (maybe one of my Technique Tuesday posts in the future will explain how to fry foods without a fryer...).


Serves: Many
Prep. time: 10-15 minutes
Cooking time: Approx. 5 minutes (or until golden brown)
Difficulty: Easy
Special equipment: Deep fryer

Ingredients

  • 1 package wonton wrappers
  • 1, 8 oz. package Philadelphia cream cheese (I used the version with 1/3 less fat)
  • 1-2 cups canned crab meat, drained and flaked/small pieces (I found this chilled at the fresh seafood counter at my local grocery store)
  • Approx. 1/4 cup green onions, finely diced/chopped
  • Approx. 1/4 tsp. grated ginger root
  • A pinch of sugar
  • Salt and pepper, to taste
  • Small bowl of water (for sealing the wontons)
  • Vegetable oil or other frying-safe oil (canola, safflower, peanut)
Be sure to taste the mixture to see if you have the right balance of ingredients. If you like a crabby wonton, add more crab meat, and if you like to taste more of the cream cheese, then add less crab meat. Add more or less ginger as desired.


Directions
In a medium bowl, combine the cream cheese, crab meat, green onions, ginger, sugar, and salt and pepper, then stir vigorously to combine. Lay out the desired amount (meaning, however many you plan to eat) of wonton wrappers on an ungreased baking sheet. Put a small spoonful of the cream cheese and crab mixture in the middle of each wonton wrapper. Dip your fingers in the water and run them along the edges of the wonton wrappers. Fold over each wrapper from one corner to the other, forming a triangle, and press the edges together to seal. Fry in hot oil until golden brown (I used a Breville deep fryer with vegetable oil, and I fried them at about 330*F). Once done, remove and place on a plate covered in a few layers of paper towels to soak up any excess oil. Plate and serve.

These little Chinese restaurant appetizers fry up golden-brown and bubbly and they're perfect as a party snack or an appetizer. If you want to make them a little fancier, replace the crab meat with lobster, or change how you fold the wontons to create a different presentation.

Tuesday, January 3, 2012

Recipe: Chicken and Fettuccine in a Garlicky White Wine Sauce

In my last post, I shared my recipe for basic pasta dough and some basic instructions for using a pasta maker, and this post features the recipe I chose to highlight that delicious fresh pasta. Homemade fettuccine pasta form the base for salt-and-pepper-seasoned chicken breasts, sauteed and then cooked in a sauce of white wine, garlic, tomatoes, and olive oil, with just a splash of cream. The sauce is creamy, yet light, and so rich and flavorful, and it clings beautifully to the pasta and chicken. More than likely, you already have all of the ingredients you need at home, and this is a really easy dish to pull together (of course, I made homemade pasta, which made it take a little longer, but regular boxed pasta obviously works just fine).


Serves: 4
Prep. time: 15 minutes
Cooking time: About 20-30 minutes
Difficulty: Easy

Ingredients
  • 2 boneless, skinless chicken breasts, pounded to about 1/2-inch thickness and cut in half (creating 4 servings)
  • 1/2 cup extra virgin olive oil, plus a little more for cooking the chicken
  • Butter or margarine, as needed
  • 2 cloves garlic, minced
  • 1 dried bay leaf
  • 1/2 tsp. dried basil
  • 1/2 tsp. dried oregano
  • 1/2 tsp. dried thyme
  • 1/2 tsp. dried rosemary
  • Salt and pepper, to taste
  • 1 medium onion (about 3/4 cup), finely chopped
  • 1/2 cup water
  • 1 cup dry white wine (cooking wine is fine)
  • 1, 14.5 oz. can petite diced tomatoes, drained
  • Approx. 1/4 to 1/2 cup heavy cream or half&half, or as needed (I didn't really measure this—I just added a few splashes of half&half to create a thicker, creamier sauce)
  • Corn starch, as needed (this must be mixed with a liquid first, then added)
  • Approx. 8-12 oz. fettuccine or other long, flat noodle

Directions
In a large skillet, heat a little olive oil (enough to lightly coat the bottom of the pan) over medium heat. Season the chicken breasts with salt and pepper and add to the pan (I also sprinkled a little garlic powder on them for added flavor). Cook until they are almost completely cooked through (about 10-15 minutes), then remove from the pan, place on a plate, and cover with foil to keep them warm.

Cooked through and golden brown

Add the dried herbs (including the bay leaf), onion, garlic, water, and 1/2 cup of olive oil, plus a little butter (just a pat or two) to the pan and cook over medium heat, until the mixture is fragrant and the onions are slightly soft. Add the tomatoes and white wine and stir to combine. Add a splash or two of half&half or heavy cream to the sauce and whisk it into the sauce to help it blend. Because the sauce has so much olive oil, it does not necessarily blend completely, so you may notice that it looks a little "unmixed"—this is alright; just whisk it a bit every so often to help keep it blended. Add in cornstarch (mixed first with a little water or cream) if desired (this helps thicken the sauce a bit). Let the completed sauce cook for a minute, then add the chicken back into to the pan, stir to coat, reduce the heat to a simmer, and cover the pan. Before serving, remove the bay leaf from the sauce (these should not be eaten). In the meantime, bring a medium-to-large pot of salted water to a boil and cook the pasta according to the package instructions. Drain the pasta, return it to the pot, then ladle large spoonfuls of the completed sauce into the pot and toss to combine. Plate the chicken on top of the sauced pasta and serve with an extra spoonful of sauce and a sprinkling of Italian cheese (Pecorino-Romano is perfect!).

The sauce is what makes this dish so good—it's rich, lightly creamy, and so smooth, and it coats the pasta and chicken perfectly. The dried herbs, onion, and wine blend beautifully with the tangy bite of the tomatoes and the garlic, and the olive oil and cream create an amazing texture to the sauce. This was the perfect dish to make with my fresh fettuccine!

Recipe: Basic Pasta Dough

My big gift this Christmas was a beautiful Marcato brand pasta maker, a kitchen gadget I'd been begging my parents for ever since I made fresh pasta during my last Foods 1 class in early December. I'd expected a basic model from our local DeLallo's store, but the model they got me is a stunning little machine, with multiple pasta cutters (including a gadget for making crinkle-edged raviolini), and an incredibly sturdy design. Last night, I convinced my mom to let us put off a dinner of leftovers until tonight and let me make pasta for dinner instead, and I had a blast using the gadget for the first time.

Making pasta from scratch has stereotypically been one of those things that foodies would brag about at a dinner party—a somewhat smug, yet casual comment like "Oh, I made homemade fettucini last week with a tomato-basil cream sauce that was to die for!" slipped into a conversation, meant to make the listener feel in awe that their friend took the time and effort to make something oh-so-complicated and oh-so-fancy. But really, making pasta isn't this big ordeal...you don't even really need a pasta maker if you've got a rolling pin and a good, sharp knife. I think the biggest hang up for people when it comes to making pasta dough is what flour to use and whether to mix it by hand or in a mixer (and how much time it can take). Traditionally, Italian pasta is made with semolina flour, but you can find recipes that call for durum wheat flour, bread flour, or all-purpose flour. Dough can be mixed by hand in the old-fashioned way, or gently mixed with a paddle and then a dough hook in an electric mixture. Basic dough only needs a few ingredients to pull it together, and once you know the basics, you can experiment with flavoring pasta by adding in minced garlic, herbs, or other flavorings. In this post, I'm going to share my recipe for basic pasta dough, as well as my method for using a pasta maker to roll out and cut the dough.


Serves: 4 (making a long noodle—in this case, it's fettuccine)
Prep. time: Approx. 1 hour, 15 minutes
Cooking time: 3-5 minutes
Difficulty: Easy to Moderate
Special equipment: Electric mixer with paddle attachment and dough hook attachment (and a pasta maker and two baking sheets for rolling out and laying out the pasta)

*Pasta dough can be mixed by hand, and if you don't have the pasta maker, you can use a rolling pin to flatten the dough to the desired consistency, then cut long strips or whatever other shape you might want, but for this post, I'm sharing the pasta maker method

Ingredients
  • 2 cups all-purpose flour
  • 2 eggs, beaten
  • 4 tbsp. water
  • 1 tsp. salt
  • 1 tbsp. extra virgin olive oil, plus more if needed
  • Flour for dusting

Directions
Put the paddle attachment in the mixer and add the eggs, water, salt, and olive oil. Gently mix on a low setting for about 1 minute, then gradually add in 1 cup of flour and increase the mixing speed slightly so that the mixture blends well. The dough should look and feel wet and somewhat thin once the one cup of flour is incorporated. Switch the paddle attachment out and place the dough hook in the mixer, then gradually add the second cup of flour while on a low-to-medium mixing speed. If the dough looks very dry and floury and doesn't appear to be absorbing the flour well, add in a little more olive oil and mix until it's a light yellowy-beige color and somewhat dry-looking. The dough should feel thick and slightly sticky and it should look fairly dry. Remove the dough from the mixing bowl and gently roll it into a ball using a little flour to keep it from sticking to your hands. Tightly wrap the dough in plastic wrap then let it rest in the fridge for 30 minutes. After resting, the dough can be unwrapped and prepared as desired.

My pasta-making station

Directions for rolling out and cooking pasta

When the dough is done resting, remove it from the plastic wrap and place it on a lightly floured surface. Divide the dough into about 4 pieces (you need to use smaller chunks of dough in order for them to fit in the machine and roll out to the right thickness and width). Depending on what type of pasta you want, there are different settings on the pasta maker for rolling out various thicknesses and different cutter attachments to cut different types of pasta. I chose to make fettuccine, so I'll share those instructions here. Set the pasta maker on the 0 setting, sprinkle a little flour in between the rollers, and roll one of the dough balls through on this setting 4 times. Moving up through the numbers (which indicate the width between the rollers, and thus the thickness of the sheet of pasta), work your way up to number 5, making sure to pass the pasta sheet through each number twice. Make sure you sprinkle a little flour between the rollers each time to prevent the dough from sticking. Repeat the process until all of the dough is rolled out. The dough sheets should be lightly floured and laid out on a lightly floured baking sheet (the flour will help keep the sheets from sticking to each other). Roll each sheet through the fettuccine cutter (you'll just pass the sheets through once), sprinkling flour between the rollers. Place finished fettuccine noodles on a lightly floured baking sheet. It's important that the noodles are lightly floured and that you pull them apart if any are stuck, because you don't want them to stick. Cover the sheet of pasta with plastic wrap or a cloth towel to keep the noodles for drying out.

When cooking the noodles, simply fill a medium-to-large pot with unsalted water and bring the water to a boil. Add the noodles and cook for 3-5 minutes, until the noodles are cooked through. The finished noodles will be softer than regular dried pasta from a box and they may feel a little slippery. Once you drain the pasta, you can add a little butter or olive oil to keep them from sticking to each other.

If you have the chance to make fresh pasta, even without the aid of a pasta maker, I highly recommend it! Fresh pasta is so much lighter and softer than dried boxed pasta and it really makes a difference in a meal (really—once you've had fresh pasta, you'll never want to go back to the dried stuff, though, unfortunately, it's not really practical to make fresh pasta all the time, haha).

Monday, November 7, 2011

Recipe: Potato and Cheese Pierogi with Kielbasa

So, this post is definitely late in getting here, but in the days after I made the recipe I'm sharing here, I had work, class, more recipes to try, and a long weekend out of town (more on that—in particular, my culinary school visits—later), and thus no time to type it up and post it. But it's here now—a recipe for some of the most amazing pierogi I've ever eaten—and I highly recommend you try it out. It's worth the work and time it takes to put them together.

Pierogi are a Polish food—semi-circular dumplings (similar to ravioli), traditionally stuffed with potato, ground meat, cheese, or other fillings, that can be boiled, baked, fried, or sauteed (after boiling). Pittsburgh has a strong Polish background and it's here that I first had pierogi—Mrs. T's brand from the freezer aisle at Giant Eagle. Since then, I've had various types of pierogi at a handful of restaurants in the Pittsburgh area—the best being from The Church Brew Works—but I always get nostalgic when I see a box of Mrs. T's. The recipe I'm sharing today immediately caught my eye when I saw it online because...well...it's all homemade and I'd just never really thought about making them from scratch (especially since Mrs. T's are always so good). I know making pasta can be a chore and even making dough for pizzas or certain baked goods can be a pain in the butt, so I was concerned this could be difficult, but the instructions made it seem very reasonable and I'm so glad I tried it out. The mashed potato filling was soft and buttery, mixed with garlic, thyme, and queso blanco (in place of farmer's cheese) for a rich flavor. The dough, made with sour cream, flour, and a few other ingredients, was thick but tender and it sauteed beautifully. I made the recommended sauce for the dish, which was so good, I'm tempted to use it for a pasta sauce, and you can find that recipe here.


Yields: About 3 dozen
Prep. and cooking time: 1 & 1/2 to 2 hours
Difficulty: Easy-to-moderate
Special equipment: Electric mixer

Ingredients and Directions
For the dough:
  • 3 & 1/2 cups all-purpose flour, plus a little extra for rolling and shaping the dough
  • 3 eggs
  • 2 tbsp. sour cream
  • Approx. 3/4 cup water (add 1/4 cup more if needed)
In a large bowl for a mixer, combine the flour, eggs, sour cream, and about a 1/2 cup of the water. On medium-low to medium speed, beat the mixture in the mixer until blended, adding the remaining water in as you go. The dough will be sticky and thick. Remove the dough from the bowl and place on a well-floured surface. Knead it gently (over-kneading will make the dough tough), using the drop technique (pick the dough up off the surface, then drop back onto the surface, turning it over each time you do it). Knead just until the ingredients are well-blended and the dough is smooth and sticky (about 3-5 minutes). Wrap the dough ball in plastic wrap and let it rest for at least 20-30 minutes while you prepare the filling.

For the filling:
  • 1 & 1/2 lb. baking potatoes (about 2 large potatoes), peeled and cut into 1 inch chunks
  • 2 tbsp. unsalted butter
  • 1 tbsp. extra virgin olive oil
  • 1 small onion, chopped (I used a yellow onion, but an sort of sweet onion would work well)
  • 1 clove garlic, minced
  • 1/4 tsp. dried thyme
  • 1 cup grated dry farmer's cheese or queso blanco
  • Salt and pepper, to taste
Put the cut potatoes in a medium pot of cold, salted water (enough to just cover the potatoes) and bring the water to a boil. Cook the potatoes until soft and easily pierced or cut through with a fork or knife (about 20 minutes). While the potatoes are cooking, add the oil and melt the butter in a small or medium skillet over medium heat. Add the onion, garlic, and thyme, cooking until the onion is slightly soft and translucent (about 3 minutes). Lower the heat just a bit and continue to cook until the onions are slightly caramelized (about 20 minutes). Add more butter if the mixture starts to look dry (be careful not to burn any of the ingredients). Add a little salt and pepper when the mixture is finished cooking, then set aside to cool. When the potatoes are done cooking, drain them return them to the pot they were cooked in, then mash just a little bit to break the potatoes up. Add the onion mixture and cheese to the potatoes and mash them until they are well-blended and no longer lumpy. Season with a little salt and pepper, stir around with a large spoon, and set aside to cool while you roll out the dough.

For the finished dish:
  • Unsalted butter, for sauteing the boiled pierogi (I just cut off small pats, about 1 tbsp. each, at a time and added more during cooking, as needed)
  • 1 onion, chopped, for sauteing in the butter with the pierogi
  • 1 recipe Sour Cream Garlic Sauce with Chives
  • 1 package kielbasa, prepared according to the included instructions (we boiled ours for a set amount of time, then sliced it into dimes and served)
Bring a large pot of salted water to a boil. In the meantime, place the dough on a lightly flour surface. Dust your hands with flour, then pull off tablespoon-sized chunks of dough and roll them into balls about 1-&-1/2 inches round (you'll get about 3 dozen total). On a well-floured surface, roll out each ball with a rolling pin until about 1/8-inch thick and 3-&-1/2 inches round, then move underneath a piece of plastic wrap or wet paper towels to keep them from drying out. (You can just roll out the whole piece of dough and cut circular pieces out of it, but all of the re-rolling and cutting will make the dough tough—rolling out small balls of dough ensures that each pierogi is tender). Once all of the balls have been rolled out, place about 1 tbsp. of the potato mixture in the center of each pierogi, then fold the dough in half and pinch the edges together, creating a half circle. Drop about 6-9 pierogi in the pot of water you brought to a boil earlier. Once they float to the surface, let them cook for another 2-4 minutes (the dough should be tender, but not chewy, when done). Remove the pierogi with a slotted spoon and allow them to drain on a paper towel. To finish the pierogi, heat a little butter in a medium to large pan over medium heat and sauté with some slices of onion, being sure to turn them over, until both sides are lightly golden-brown and crispy. Serve with slices of the cooked kielbasa and top with the Sour Cream Garlic Sauce with Chives.

These pierogi are tender and packed with flavor! The creamy potato filling, mixed with garlic, thyme, and cheese, is so soft and light and complimented perfectly by the salty kielbasa and creamy sauce. This is an incredibly filling dish and absolutely perfect for cold weather.

Friday, September 30, 2011

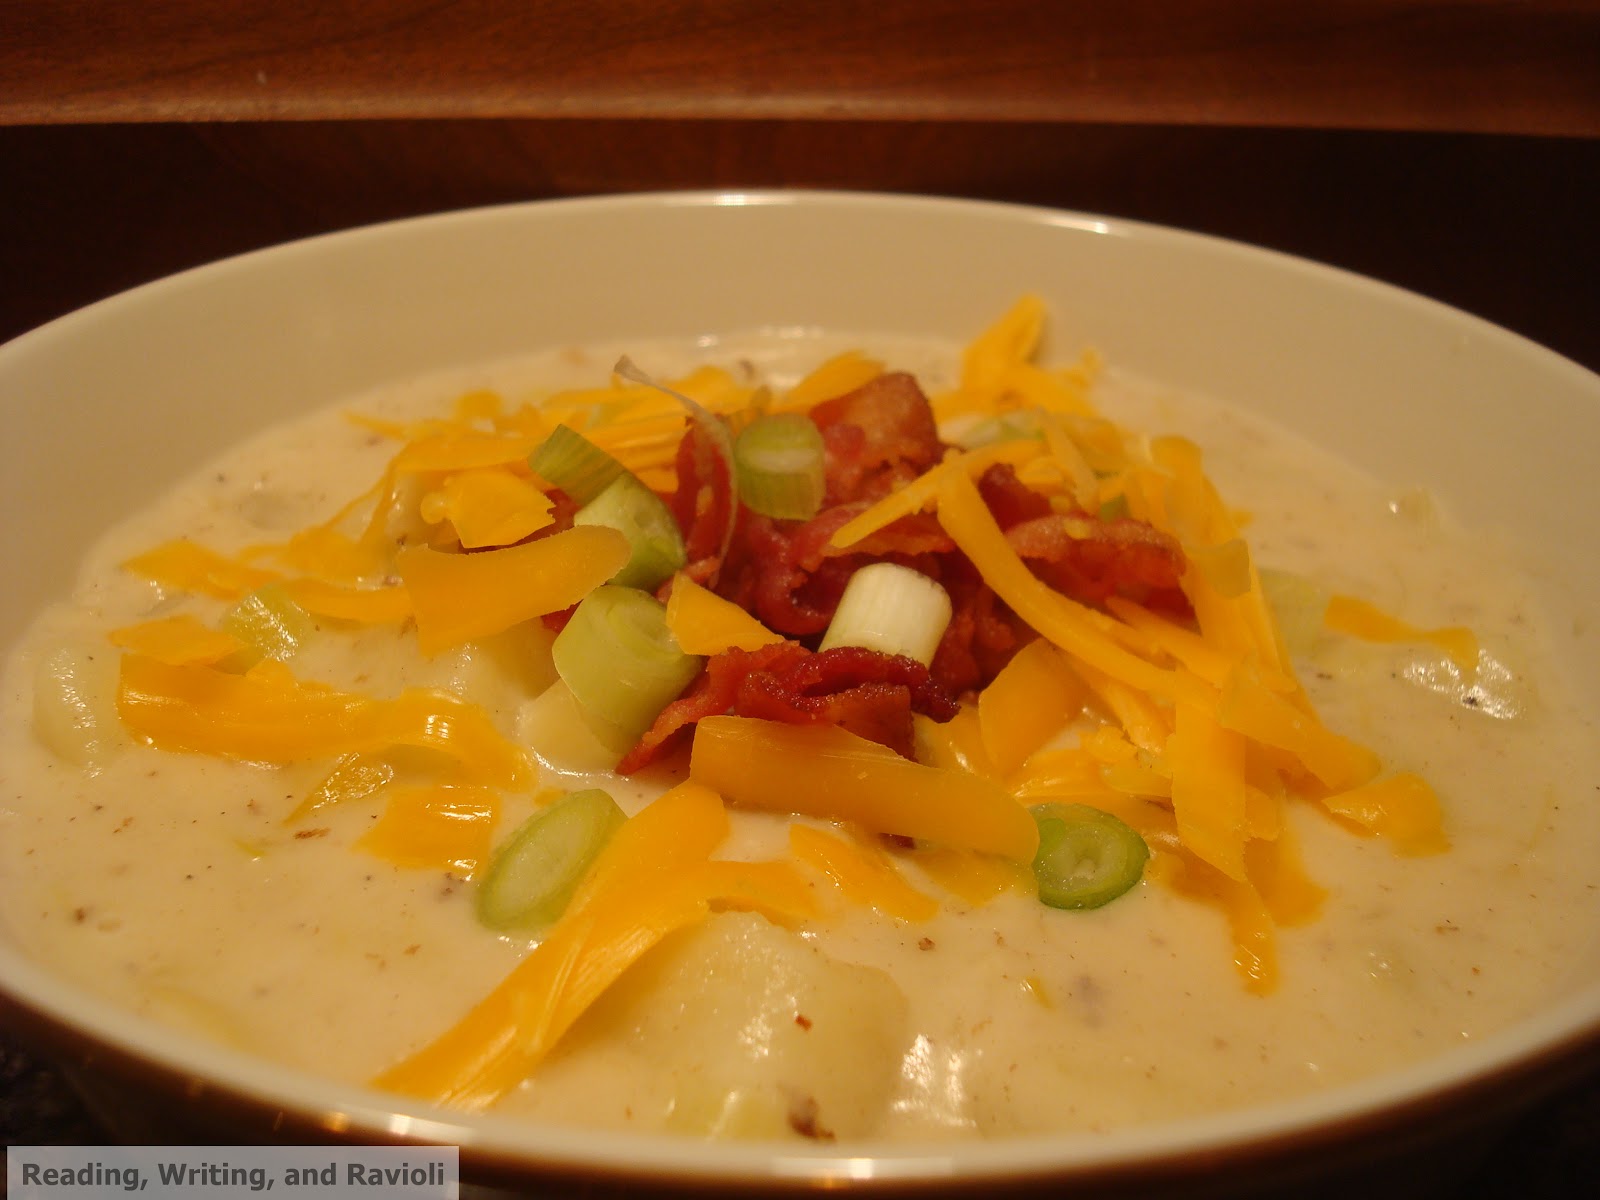
Recipe: Potato Soup

Words that describe today: Cold. Rainy. Grey. Dreary. Autumn. Cold (did I already say that?). I spent my morning in a warm kitchen for my Foods 1 class, learning how to make Espagnole (one of the five mother sauces; a brown sauce), variations on that sauce, and tomato sauce. When I got home, I changed into pajamas, curled up in bed under a mound of blankets with the space heater on, and basically went into a brief hibernation mode, napping for two hours. When 5:00PM rolled around, all I wanted was a warm, hearty dinner, which is lucky for me, because I picked up the ingredients for my cousin's fabulous potato soup late last week and it's the perfect meal for a chilly day in the North. This is yet another meal I tried at my cousin's place over the Labor Day weekend, and it's an original "Katie" recipe—a recipe that I'm glad she shared with me. The soup has small chunks of soft, warm potato in a thick, creamy base. Topped with crispy bacon, fresh green onions, and grated cheddar cheese, it's the perfect meal for a cold and damp autumn evening.


Serves: 4-6
Prep. time: 10-15 minutes
Cooking time: 30-40 minutes
Difficulty: Easy

Ingredients
  • 4-6 strips bacon, cut into 1 inch cubes/strips
  • 2 tbsp. butter
  • 5-6 garlic cloves, minced
  • 2 medium leeks, diced (be sure to clean these thoroughly by letting them soak in water and by cutting off the tops—they are incredibly sandy and dirty and you don't want that grime getting into your soup)
  • 1/4 cup flour
  • Approx. 3 lbs. potatoes (about 4 medium potatoes or 8 small potatoes), diced (smaller pieces will cook faster)
  • 3 cups chicken stock
  • 1 & 1/2 cups water
  • 1 cup heavy cream
  • Salt and pepper (and white pepper), to taste
  • Corn starch, if necessary (a small—no more than 1/4 cup, and likely less than that—mixture of cornstarch and water can be added to the soup to help thicken it if it's too thin)
  • Shredded cheddar cheese, bacon, and diced green onions, for garnish and taste (I set out about a 1/2 cup of each)

Directions
In a large pot over medium high heat, cook the bacon until crispy, but not overly brown or burnt. Remove from pot, set it aside on paper towels to soak up some of the grease, then use that as your bacon garnish at the end (if I remember correctly, my cousin cooked two small batches of bacon and actually included some of that bacon in the soup, but I chose not to do that). Drain all but 2 tbsp. of the bacon grease into a small bowl and set aside (you may want to add a little more to the soup later—that's what I did, to add a little more flavor). Add the butter to the pot, then add the garlic and leeks, cooking them until they are slightly soft. Add the flour and stir around, making a sort of roux (this helps thicken the soup a bit). Cook until the butter and grease mixture is incorporated into the flour and there is no longer any flour smell. Turn the heat up to high, add the chicken stock to the pot and deglaze it (use a spoon or spatula to scrape the brown bits off the bottom of the pot). Add the water and heavy cream and stir to combine. Add the potato chunks and cook until they are cooked through (15-20 minutes). If the soup seems too thin, add a little of the cornstarch-and-water mixture and continue to cook, adding more as needed, until the soup is thick enough to coat the back of a spoon. If your soup is too thick, add a little water to thin it out. Add salt and pepper (and white pepper), to taste. Serve topped with bacon crumbles, shredded cheddar cheese, and diced green onions.

This soup is creamy, hearty, and rich without being overwhelmingly rich. The cheddar cheese, green onions, and bacon add a punch of flavor to the dish, as well as some crunch and texture. It's the perfect dish for a cool autumn evening or a cold winter day and it reheats wonderfully.

Monday, September 19, 2011

Sunday Brunch (recipes and tips included)

Three weeks ago, on our first "real" day of Foods 1, we had "Breakfast Day," meaning the topic covered and food cooked that day all fell into the category of "breakfast." We learned how to flip an egg (I give a brief, simple how-to here) and how to properly whisk eggs for scrambled eggs and omelets—basically, if you think you've whisked them enough, keep going. The goal with whisking eggs is to make them light and fluffy by incorporating air into them. You don't want any of the whites (clear bits) floating in the mix and you want to see lots and lots of little air bubbles—that's when they're perfect. Aside from some egg preparation and cooking techniques, we all got a chance to make crepes (which were later used to make cheese blintzes), and each kitchen was assigned a different breakfast item to prepare and cook for the class. My kitchen made cinnamon french toast, and other kitchens made cheese blintzes and pancakes, then we brought all of the dishes together and had a breakfast smorgasbord.

I must say, I make a pretty mean omelet and my crepes weren't half bad either, and I've been eager to show off my breakfast cookery skills. I had a chance to do just that during my Labor Day Weekend visit to my cousin's place in D.C., but I'd promised my parents I'd make them a big Sunday brunch as soon as we had a weekend at home. This past weekend was just that, and yesterday, I planned out a big Sunday brunch of made-to-order omelets and crepes filled with fresh whipped cream and ripe strawberries. Now, making the omelets was a little tricky, because in class, we used the salamander (essentially, a broiler), but I was just using the broiler setting in my oven at home. The crepes were pretty easy to do, though it took me a little while to master the technique of flipping them without tearing them (because they're so thin, they're pretty fragile). Because everything was basically done one at a time (make one omelet, then another; make one crepe, then another), I didn't really get a chance to sit down and eat with my parents, and it was a long brunch, but I'd still call it a success (especially since everything was so delicious).

Sauteing mushrooms and onions for my dad's omelet...and making a mess on the counter while I do so.

Now, first things first: omelets. As I said above, the keys to a great omelet are to properly whisk the eggs and to not burn or brown the eggs as they're cooking. I kind of failed on that second key point (though I'm still including a picture), but I was adapting to an oven broiler as opposed to a salamander and figuring out the right amount of heat for our stove (which is different than the restaurant-grade stoves we use for class). Omelets can be simple and just be filled with cheese and maybe ham or sausage, but you can stuff them with just about anything you want. My mom requested tomatoes, spinach, and cheddar cheese. My dad was eager to eat an omelet stuffed with mushrooms, onions, and cheddar cheese. I opted for spinach, onion, and cheddar cheese. (Guess we all really like cheddar cheese...) Whatever you choose to fill the omelet with won't cook very long in the egg, so I recommend lightly sauteing those ingredients first (especially harder ingredients, like onions and peppers)—sauteing helps soften and release some of the flavor of the ingredients. Now, onto some omelet-making instructions...

Turn on the broiler in your oven. Heat a medium skillet (nonstick is best) over medium high heat. Add a little bit of butter (about a tsp.) to the pan, and once it's melted, add your omelet ingredients (the stuff you're putting in the omelet) to the pan and saute lightly for a few minutes. Remove the ingredients from the pan and set aside. Wipe the pan out and return to medium-high heat. Melt a little butter in the pan, then add the well-whisked egg to the pan. Gently push the edges of the egg inward and let the still uncooked, wet egg pool out into the edges of the pan (this helps cook more of the egg, and do it faster). Do this just a few times (but not too many times, because then you'll just end up with gently scrambled eggs...and yes, next time I do a tutorial in a post, I'll include pictures), until the middle of the egg is wet looking, but slightly cooked underneath. Add the filler ingredients (what you sauteed earlier), then place in the oven, under the broiler, for a minute or two, until the top looks cooked.

Mmmm...look at all that melted cheese.

Now, when you pull the skillet out of the oven (using an oven mitt, because that handle will be HOT), set it on a flat surface. You can fold the omelet in half, then plate it, or you can make it a little nicer and fold it twice—fold one side to the middle and then the other to the middle, slightly overtop of the already folded side. Flip over onto serving plate, so that the folds are on the bottom. If you want a pretty plate, top the omelet with some of the ingredients used to stuff it. My presentation is not very pretty, but to be honest, I had already made two omelets and I was starving, so I took the picture as fast as I could. Big mistake for a food blogger, but oh well.

If you do it right, your omelet won't be brown like mine. It'll be golden-yellow. Also, I should have sprinkled some spinach on top for color. Alas and alack. For once, beating my hunger was more important than taking a great picture.

So, now that the omelets are done, it's time for crepes. Crepes can be sweet or savory, and kind of like omelets, there's a lot you can fill them with. My favorites include berries and fresh whipped cream, as well as bananas and Nutella, but you can fill them with a variety of other ingredients. The recipe I'm sharing comes from my culinary arts class textbook, On Cooking, and, though I halved the recipe (going from 30 to 15), I still managed to get about 20 crepes (plus one or two rejects). Crepes are typically cooked in a special crepe pan, but a small, nonstick skillet will work just as well. They're a little tricky to flip, and I recommend using a spatula and having a fork on hand in case you need something small to help with flipping. Oh, and sorry for the measurements in ounces. Just weigh the ingredients on a kitchen scale (but be sure to weigh whatever it is you place the dry ingredients on/in first, so you can figure that out of the total weight).


Yields: Approx. 20 
Prep time: 30 minutes to an hour
Cooking time: 1-3 minutes per crepe
Difficulty: Moderate

Ingredients
  • 3 whole eggs
  • 3 egg yolks
  • 6 fl. oz water
  • 9 fl. oz. milk
  • 3 oz. sugar
  • 1/2 tsp. salt
  • 7 oz. flour
  • 2.5 oz. unsalted butter, melted
  • Butter (for the skillet)

Directions
Whisk together the eggs, egg yolks, water, and milk, then add the sugar, salt and flour, and whisk together. Stir in the melted butter (after you've let it cool just a bit). Cover and set aside to rest for 30 minutes to an hour before cooking.
Heat a small skillet over medium high heat. Add just a little bit of butter (seriously, a little bit goes a long way; if you add too much, it'll make your crepes greasy). Pour in a spoonful of batter (use a large serving spoon) and swirl it around in the pan to coat the bottom evenly. Don't pour in too much batter—you aren't making pancakes, you're making thin crepes, so you don't need much. Cook until the crepe is set, and looks slightly dry around the edges and in the middle. Carefully flip over and cook until the bottom is lightly browned. Remove from pan. Serve hot or let it cool first, and serve with whatever fillings you want. Repeat this process until all of the batter is used up (don't chill or freeze the batter, then try to use it later). Crepes can be kept briefly in a warm oven while you continue to cook more. Leftover crepes can also be stored in the fridge for 2 or 3 days or frozen for a few weeks.

So that's my lengthy brunch post. Despite it being a long and busy morning, the food was definitely worth it. Savory omelets, perfectly fluffy and hot, plus sweet, warm crepes filled with fresh whipped cream and ripe strawberries....breakfast doesn't get much better than that.

Saturday, July 30, 2011

Recipe: Beef with Broccoli and Snow Peas

My mother bought a pack of five great-looking New York strip steaks earlier this week, two of which I used earlier in my Penne with Beef and Arugula dish, so I was looking for recipe ideas for the remaining steaks. I decided to try my hand at making beef and broccoli (plus snow peas, at my mother's request) because it seemed like the perfect way to put the steaks to good use. I looked through various recipes online to get an idea of how to make it and based my final recipe on this one. The result was a flavorful, filling dish that I would confidently say was better than most Chinese restaurant versions that I've tried. Yes. It was that good.


Serves: 4
Prep. time: 15-20 minutes
Cooking time: 5-10 minutes
Difficulty: Easy

Ingredients
  • 2 (8 oz.) New York strip steaks (part of what makes this dish better than a lot of restaurants is a better cut of meat)
  • 7-10 oz. broccoli florets (I used baby florets, because the smaller size makes them easier to eat)
  • 2-3 oz. snow peas, cleaned (peel away the stringy bit of green on the straight edge of the peas)
  • 3 tbsp. peanut oil (or vegetable oil)
  • 1 tsp. corn starch dissolved into 1/4 cup water
For the beef marinade:
  • 1/4 cup soy sauce (we use lite/low sodium sauce)
  • 1 tsp. freshly peeled and grated ginger root
  • 2 garlic cloves, finely minced
  • 2 tsp. Chinese rice wine (or dry/cooking sherry—that's what I use)
  • 1/2 tsp. corn starch
For the sauce:
  • 1 tbsp. soy sauce
  • 1 tbsp. plus 1 tsp. oyster sauce (this can be found in the Asian food section at your grocery store and, yes, you really do need this for the dish—it's a necessary flavor)
  • 1 tbsp. Chinese rice wine (or dry/cooking sherry)
  • 1/4 cup water
  • 1/2 tsp. corn starch (this acts as a thickening agent)

Directions 
Cut the steaks (against the grain) into thin slices. Mix together the ingredients for the beef marinade and put the beef slices into the marinade, tossing them in the mixture to completely coat them. Set aside to let the beef soak up the flavors.
Blanch the broccoli by bringing a small pot of water to a boil and adding the broccoli, cooking it for 2-3 minutes, then draining the water. Put the snow peas and broccoli in a covered dish and set aside. Prepare the sauce for the dish in a small bowl and set aside.
Heat a large frying pan or wok over high heat. When a drop of water sizzles and evaporates immediately when dripped into the pan, add the oil to the pan and tilt the pan a bit so that the oil coats the bottom evenly. Add the beef, spreading it out so that no pieces are on top of each other, and let them fry for 1 minute. Flip the slices over and fry for another minute, then add the sauce, broccoli, snow peas, and cornstarch-and-water mixture and reduce to medium high heat. Cook, stirring, until the sauce is boiling and has thickened, about 1 minute. Remove from heat and serve alone or over rice.

Sizzlin' away in the frying pan

This is one of my favorite dishes out of those that I've made so far this summer. It's definitely got that umami flavor that those Kikkoman commercials talk about—a rich savoriness that is so delicious. It was definitely fun stepping away from Italian food tonight and this was a great alternative to buying cheap take out from the local Chinese restaurant.